21.04.2021. | Our products
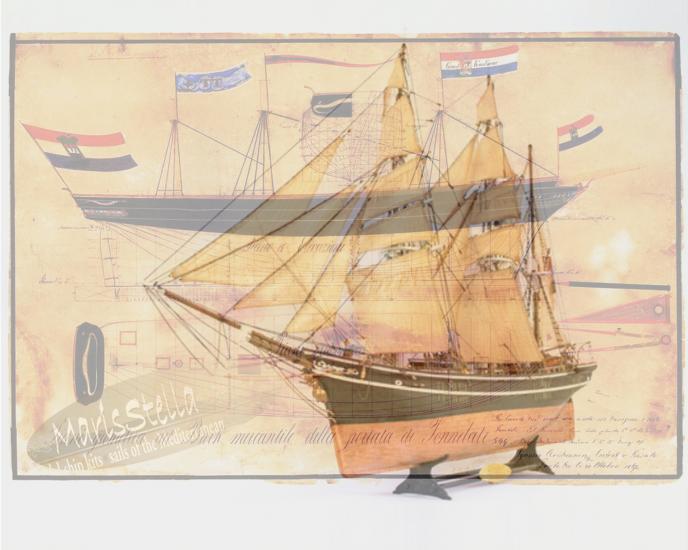
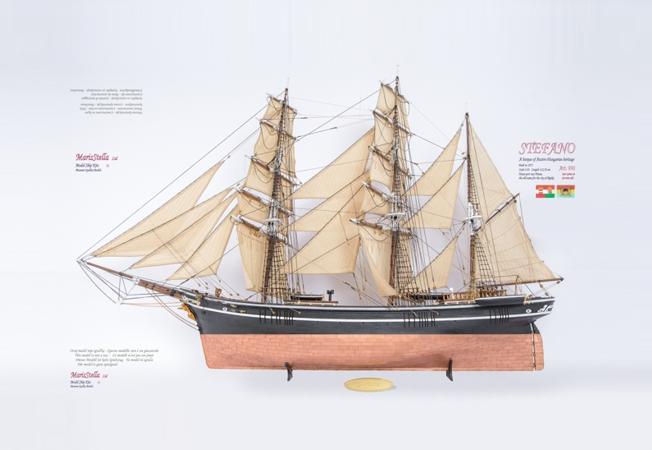
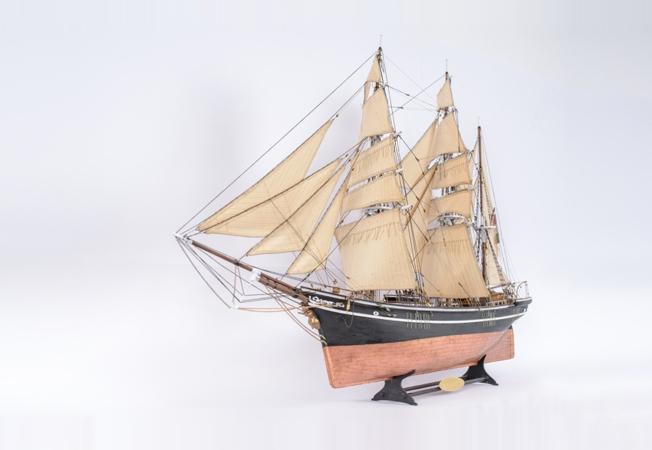
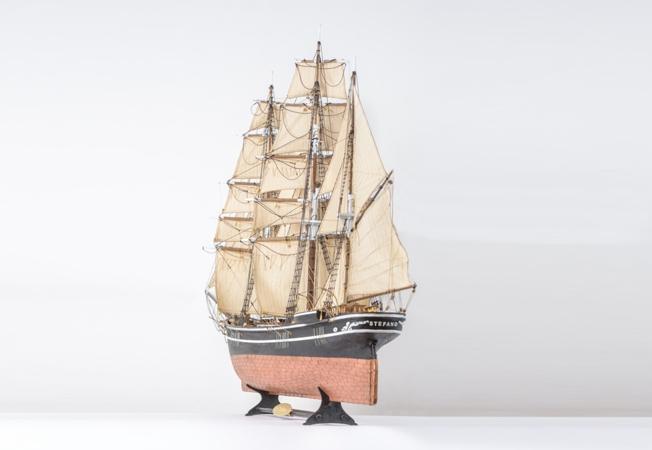
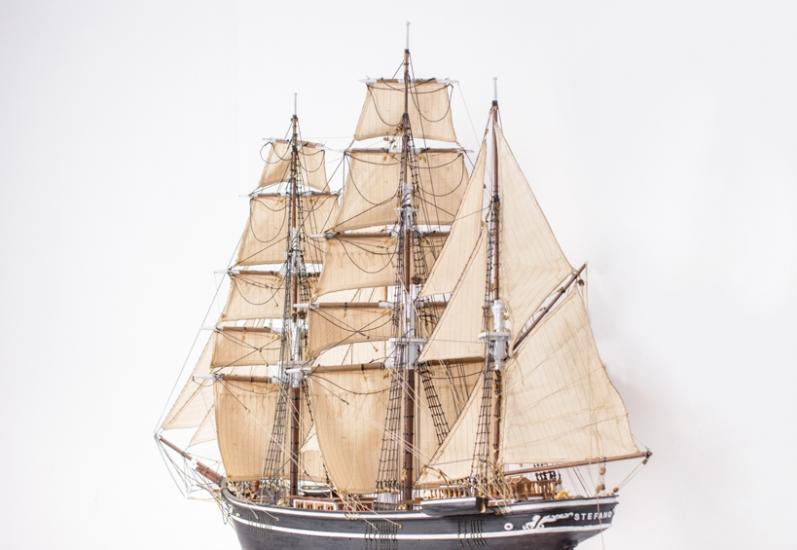
Barque Stefano 1/63 scale 44.13`` 121.1cm Model Ship Kits MarisStella
The Fateful Last Voyage of the Barque Stefano
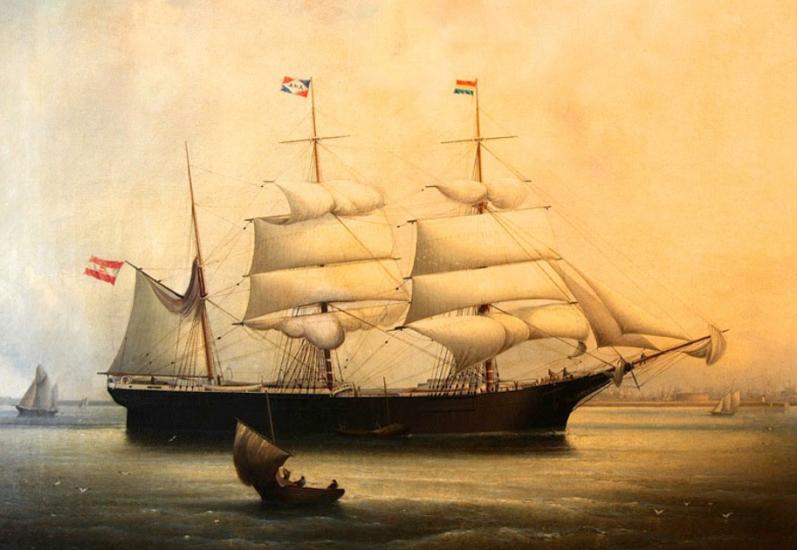
The barque Stefano has just been launched in Rijeka and sits at the dock. The smell of wood and tar permeates the harbor coming from the 170’ (51.9m) Stefano. A very modern ship for its time, it will be captained by twenty-six-year old Vlaho Miloslavich. Miloslavich will take Stefano on its maiden voyage to Wales to load up with 1300 tons of coal. The coal is to be delivered to Hong Kong, a four-month journey away.
The trip from Croatia through the Adriatic and the Mediterranean seas and into the Atlantic Ocean to Cardiff was uneventful as the crew learned the ship and her ways. In Cardiff, the ship was loaded with Welsh coal and it sailed down the Bristol Channel after casting off near Lundy Island. The ship followed the trade wind route to the Cape of Good Hope at 35o of south latitude and turned east toward Asia. After passing the Cape pf Good Hope, the ship ran into a storm. They sailed under two lower topsails and the jib for nine days.
As the Australian Coast neared the ship had to turn northeast to reach the East Indies and go through the Ombrai Strait into the Pacific Ocean. Because of the gale Stefano was within sight of the Australian Coast and the captain set a northwesterly course to pass the Northwest Cape.
At around 2.30 am on the 26th October 1875 the ship smashed into a reef, putting it hard aground. The wind ominously increased to gale force as the ship pounded on the coral heads. The crew tried pumping the bilges, but the water was coming in too fast. They tried to set more sail to drive the ship over the reef and into deeper water. To no avail. They tried to launch a lifeboat, but a huge wave smashed it against the hull and broke it into pieces. A second lifeboat was successfully launched, only for it to be swamped in the heavy seas. The last four crew launched a third lifeboat only to have to capsize, throwing them into the heavy seas.
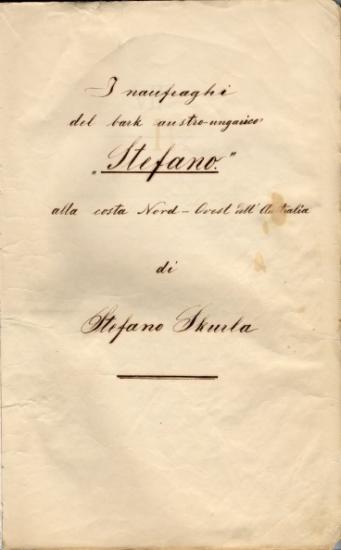
By clinging to the wreckage, nine of the crew made it to shore. A distance, they found to be about ten miles from the reef. It took them twelve hours to reach the shore at Point Cloates in Northwestern Australia. Once ashore they gathered wreckage and made a camp. Then the survivors began a desperate search for food and water in the desolate region. They began to walk south hoping to find a village, but after a few miles decided to return to their base camp. As weakness and starvation took over, the last two surviving crew members were ‘adopted’ by aborigines and shown how to survive in the inhospitable territory. Eventually these two teenagers, Miho Baccich and Ivan Jurich, were rescued after six months on the Australian coast. The boys eventually returned to Dubrovnik where they told their story to a Jesuit scholar who wrote it down. A hand-written duplicate of the story is in the National Museum in Rijeka, Croatia, near where the ship was built.
RM
Why Did We Choose the Barque Stefano?
Stefano is an extremely beautiful barque in the class of ships that were built in Rijeka (Fiume) at that time. With its beauty the ship impressed the captains of other ships in the harbor and that admiration was recorded in their ship's logs.
But beauty is not the only reason why we decided to model the barque Stefano from among several hundred Rijeka (Fiume) built barques. We chose this ship because, when it was built, Stefano was the last word in technology and no money was spared for its construction. It utilized the latest in design, construction and equipment. At this time the crews of these ships, along with their captains, sailed the world's seas, carrying the name of their homelands (Istria, Kvarner, Dalmatia and Dubrovnik) to all ports of the world.
To remind us of their beauty, we have collected some images of the votive paintings of these famous barques shown in the blog
Telling the Story
. Among them, Stefano stands out as a symbol of the hard work, long hours and often poor pay of the sailors who gave their youth and lives to sailing and the sea in all its beauty and cruelty. When the sailing ship era ended, only our memories and our stories remain...
A prerequisite for any reconstruction is to ensure all the details about that vessel are correct and accurate. It is best if we find the ship with original drawings. This makes developing a model a formality. But only rarely does all the information come from a single source. Often these details come from many different sources and choices must be made to allow each source to agree with other sources. For example, it often happens that a drawing comes from one source, more information comes from the ship’s logbook, and even more information may come from crew letters, bills of lading and even official sources, such as insurance companies, ship registries, and port logs.
When we started the reconstruction of Stefano, we had very few resources, but we had accurate paintings of sister ships, plus we knew the shipyard where the vessel was built, the exact year of construction and launching. In addition, we knew the ship’s exact dimensions from the original logs, and we had various descriptions of the vessel. From this information we had to do a lot of detective work.
Armed with this information and the data from historical records we learned that Stefano was built by the Brazzoduro Brothers in their shipyard in Sušak. The owner was Nikola Bačić, a lifelong resident of Rijeka (Fiume), but born in Dubrovnik (Ragusa). He had the vessel built to the best standards of the day. According to records of the ship, ’The barque was fine in all its proportions, of modern handsome build and well-studied model. No expense had been spared to make her one of the best, most solid and rapid of its kind.’
The Maritime Governance (Governo Maritimo) list of 1874 shows that the ship was registered in Rijeka on 3rd January with a crew of fourteen and a capacity of 857 registered tons. We assume that the registered tonnage of 857 tons and he stated tonnage of coal loaded (1300 tons) may be due to the differences in the way registered and actual tonnage are measured.
The Brazzoduro Brothers were among the best shipbuilders in Rijeka (Fiume) and there were eighteen shipbuilders in the immediate area. The Brazzoduro brothers began building ships in 1833 and built 53 vessels including Stefano. They are best known for their building of the 412 ton clipper ship Aquila in 1853, mostly because a model of this ship entered in the
Exposition Universelle des produits de l'Agriculture, de l'Industrie et des Beaux-Arts de Paris in 1855. For short, it was known as the Paris Exposition as ordered by Napoleon III. This exposition was visited by more than five million people and the Aquila model was awarded a gold medal for excellence. The model was based on specifications provided by the Rijeka Chamber of Commerce and the Ministry of Maritime Affairs. All of the data about the Aquila model was recorded and we assume that Stefano was built using similar methods and dimensions.
We also learned the style of building such ships from that era in that region, which gave us a template for the reconstruction. For example, in those days, the owner of the ship might decide that they needed a ship of a certain number of tons, not to exceed a specific length, have a specific beam and cost a certain amount. The shipbuilder would adapt this information to suit the style of ship they had previously built. The equipment was always the same from a particular builder, the rig almost always adhered to specific dimensions (see below) and the vessel would be built by the same methods the builder had used for any number of previous vessels.
Barque Izak (Isaak) 1870; 1048 ton; length 51.73 m; breadth 9.98 m; depth 6.44 m; Painting: oil on canvas: Carl Justus Fedeler (Bremen-Bremerhaven); circa end 19th-century; Photo J. Petkovic
Stefano’s dimensions were 51.9 m Length of hull, (170.2 feet LOH), Beam 10 M (32.8 feet), Draft 6.3 m (20.6 feet). By finding a similar vessel close to the same size we also found that the barque Izak (Isaac) was Stefano’s sister ship. Izak was built in Bremen a few years before Stefano. A picture of Izak is in the Dubrovnik Maritime Museum. By scaling the yards and masts from the painting we were able to determine the proportions of the entire rig and to determine the style of rigging the ship.
By comparing both ships the following dimensions were obtained.
LOH (m)Beam (m)Draft (m)
Stefano 51.9 10.0 6.3
Izak 51.75 9.98 6.44
The differences in length and beam are under 1% while the draft is about 2% different. Interestingly, the LOH in the manuscript of 50.5 m (see below), and the LOH of 51.9 m from the Registre Veritas in Paris is slight, with the 51.9 measurement assumed to be correct.
Barque Grad Karlovac, Kraljevica 1867
We also know precisely the style of ship construction used by the Brazzoduro brothers at their Sušak shipyard in 1873. The construction is similar to the barque Grad Karlovac (Town of Karlovac), built in Kraljevica in 1867. We adjusted the hull lines of Grad Karlovac to the dimensions of Stefano. By following the Grad Karlovac’s style of construction and rigging, we obtained the following data:
The Grad Karlovac had:
• Ten square sails on the fore and mainmast
• A spanker and gaff topsail on the mizzen mast
• Three staysails between the mainmast and the foremast with two staysails between the main and mizzen masts,
• A bowsprit with three jibs,
On the deck there were:
• Three hatches
• Two cabins with companionways to the lower decks
• Three lifeboats
• A bilge pump
• A steering wheel at the stern
• Anchor and chain windlass.
The original manuscript of Stefano’s shipwreck; Father Stjepan Skurla
From here the trail goes back to the original manuscript of Stefano’s shipwreck. When the two survivors of the wreck returned to Dubrovnik, they had a Jesuit Scholar, Father Stjepan Skurla, write up their experiences. This manuscript gives some details of the ship’s rigging and construction.
Many essential construction details are given in the first pages of the Baccich-Skurla manuscript. However, the original 1920 English translation by Angelina Baccich, the wife of Miho Baccich, emphasized the literary rather than the structural content of the Stefano’s construction – especially the complexity of its rigging, which she summarized as follows, ‘The sailors, all expert seamen, soon had the vessel fully rigged and equipped, from prow to helm, all sails were unfurled giving the barque the appearance of a large, beautiful bird.’
The original manuscript narrative is a lot more technical and describes in some detail the Stefano rigging. These details include:
• Foremast (sails: foresail, fore topsail, topgallant and fore royal),
• Main mast (sails: mainsail, main topsail, main topgallant and main royal),
• Mizzen or Spanker mast (sails: spanker and gaff topsail) and
• Bowsprit (with four jibs).
The original manuscript also indicated that:
• Between the main mast and the foremast were strung three staysails.
• Two similar sails were between the main and spanker masts.
• On the main mast and foremast studdingsails were added on lower, middle and upper fixed sails.
Barque Fiume E 1881; unknown artist (Courtesy Rijeka Maritime and History Museum of the Croatian Littoral)
Another step in the Stefano reconstruction was to determine the height and placement of the masts and the length of the yards. These specifications generally come from conventions of the time using ratios and proportions relative to the hull dimensions of the vessel. More information was gained from paintings of similar barques and showed that lower and upper topsails were part of the rig.
Like the painting of barque Izak, the painting of barque Fiume E offers a good case in point. The side-elevation of this vessel gives measurable details of its length, mast, yards and associated placements. The Fiume E, like the Stefano, was built in Rijeka in 1881 and its length and proportions offer the trajectory of the type of vessels built in Rijeka.
Additonal Information
In 1997, what is believed to be the wreck of Stefano was discovered by Western Australia Maritime Museum divers on the North West Cape (Point Cloates) of Australia. When the wreck was found a number of artifacts were recovered. These items are listed below:
• Bell, remains of a belfry and sliver of brass
• A navigation light
• Two sheathing fragments
• Fastening (short bolt or dump)
• Deck light
• Five rudder pintles
• Eleven coal samples
• Twelve wood samples
Because there are a number of wrecks in this area, there is some doubt as to what ship might have been found. But an answer can be gained by examining the timbers. The wood characteristics indicate that it comes from the interior of Croatia, as would have been common at the time. In addition, coal samples indicate they may have come from Wales.
Painting Cutter Jessie
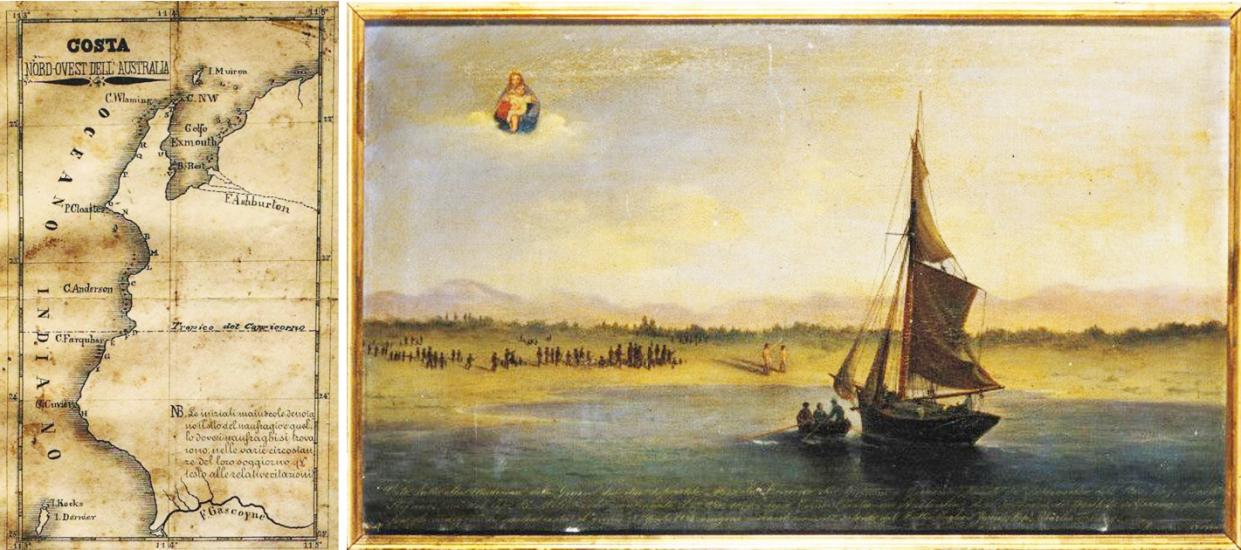
The North West Cape of Australia: Votive painting showing the rescue of Stefano survivors Miho Bačić and Ivan Jurić, with Aboriginal benefactors and Captain Charles Tuckey, and his cutter Jessie; Artist: Ivankovic,1877; Copyright: Church of Our Lady of Mercy, Dubrovnik, Croatia
About the Model
The model is a faithful reproduction of the actual ship developed from the original plans of the barque as described above. The original model built by Mladen Mitich and Branko Vekarich is in a Dubrovnik’s monastery with original painting of the cutter Jessie rescuing survivors.
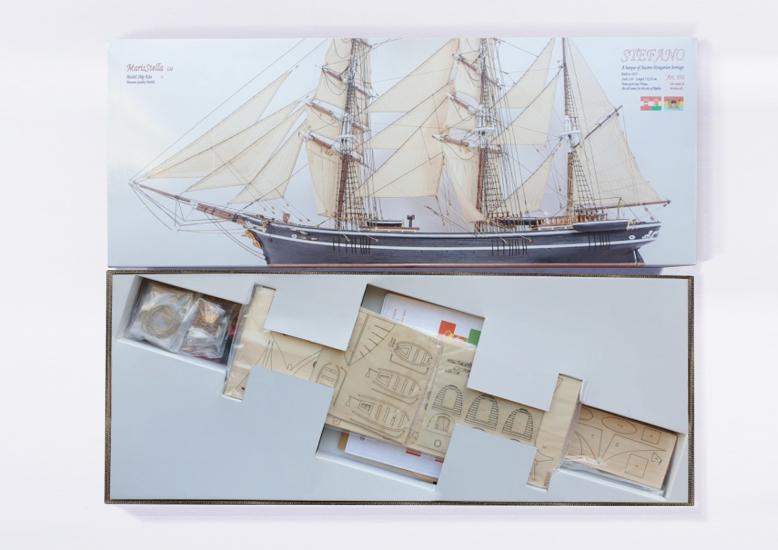
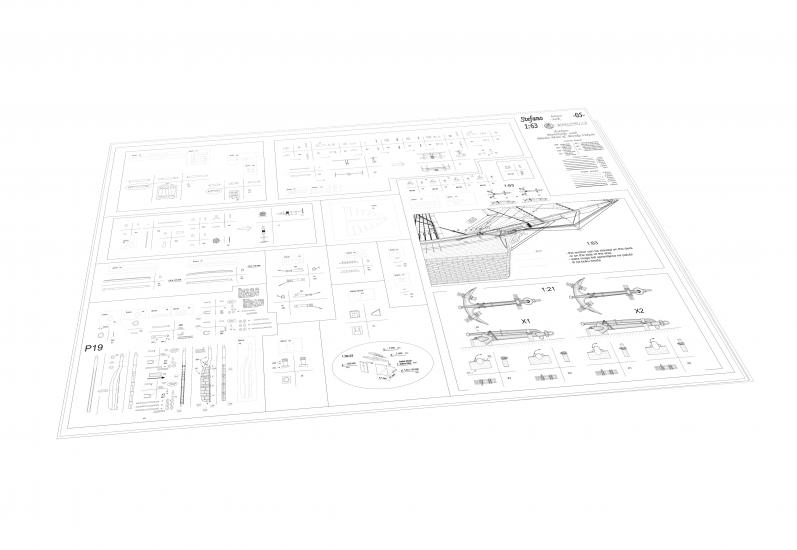
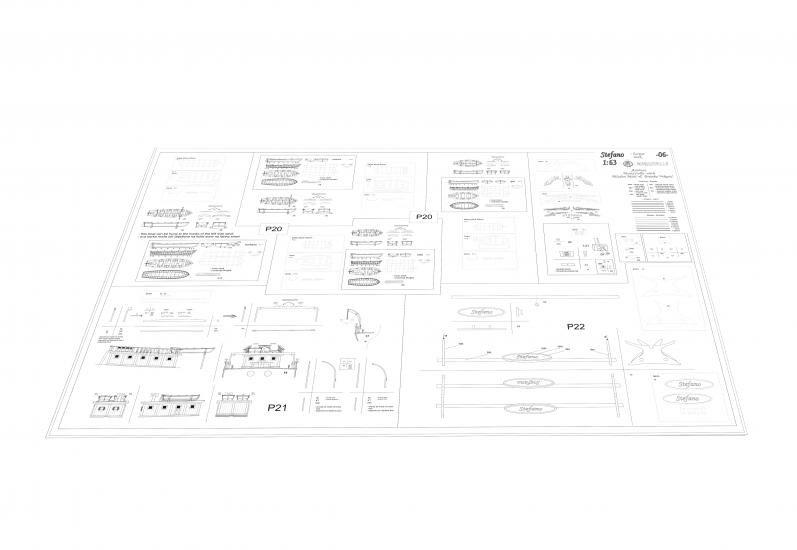
MarisStella completed the reconstruction and turned the model into an advanced model ship kit. The hull has laser-cut bulkheads and is double planked. The wood used is linden, beech and walnut. Everything needed to build the model, including sails, is in the kit box. In addition, there are fourteen pages of plans and images of the vessel to enable you to build a perfect replica.
You get a model kit complete and ready to be built. It comes with:
All the top-quality wood parts needed to build the model comprising 12 large laser-cut basswood and walnut sheets
All wood planking for the hull… linden, beech and walnut
All wood for other elements… walnut
The length of the strips in the box is 100cm(39.37”)
Materials for making Jollyboats with oars (to be made the MarisStella way)
Materials for making masts and spars in appropriate sizes with all the necessary rigging including chainplates:
Rigging thread light
Rigging thread black
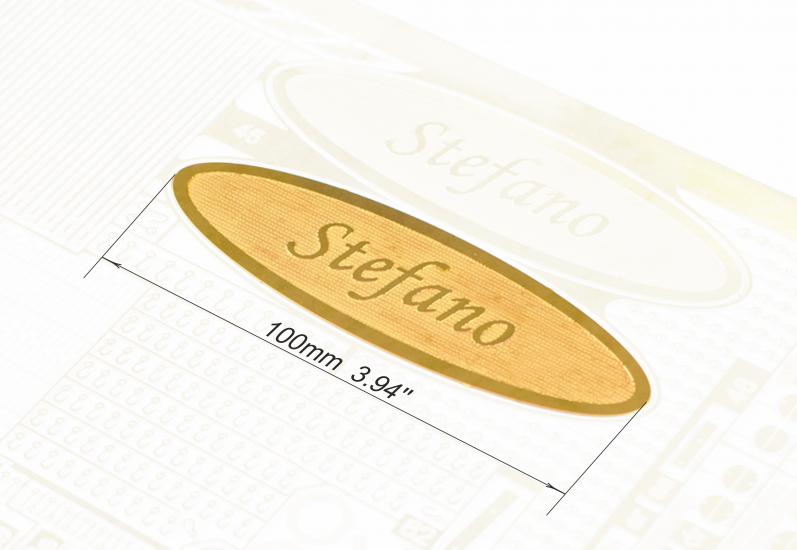
Photo etched brass sheet with elements and inscriptions…. 20cm x30cm (7.87” x 11.81”)
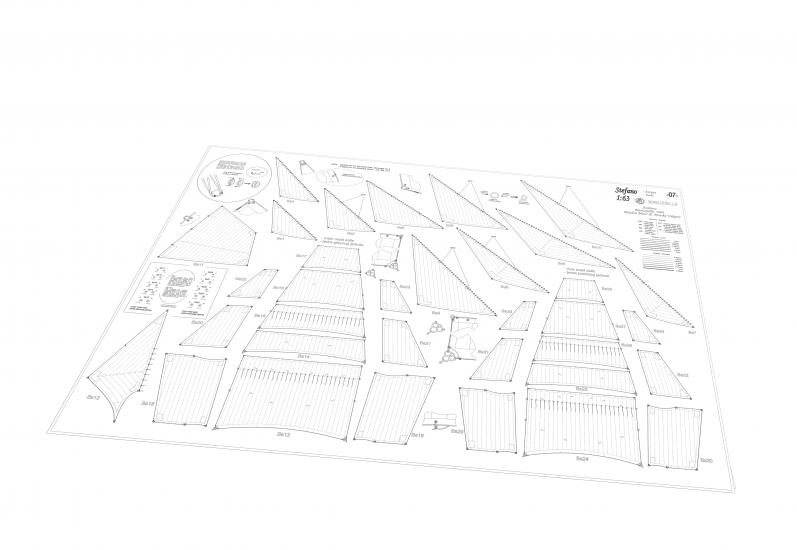
A set of the sail, embroidered onto fabric, pre-sewn…. 34 sails
Instruction manual A4, main points illustrated… 174 pages… in English, Italian and Croatian language.
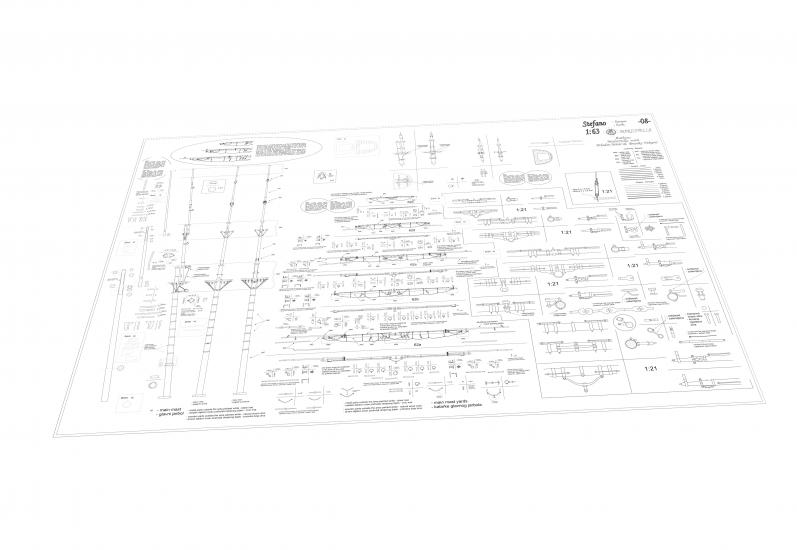
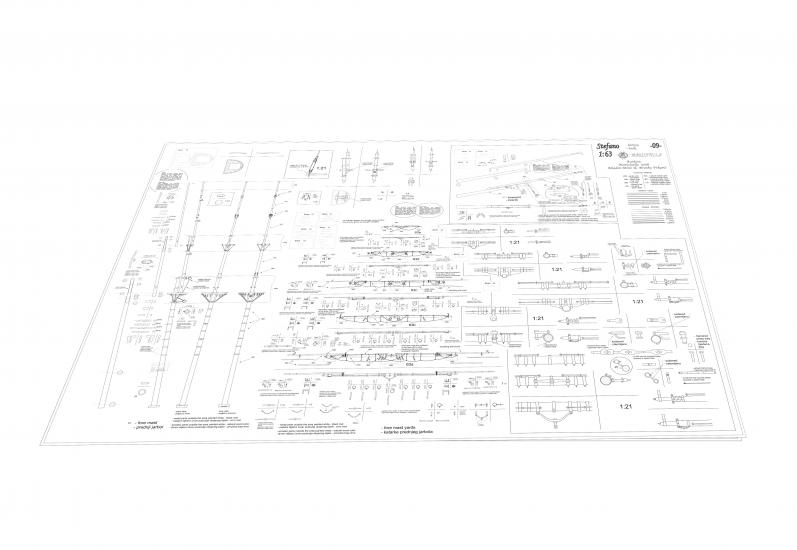
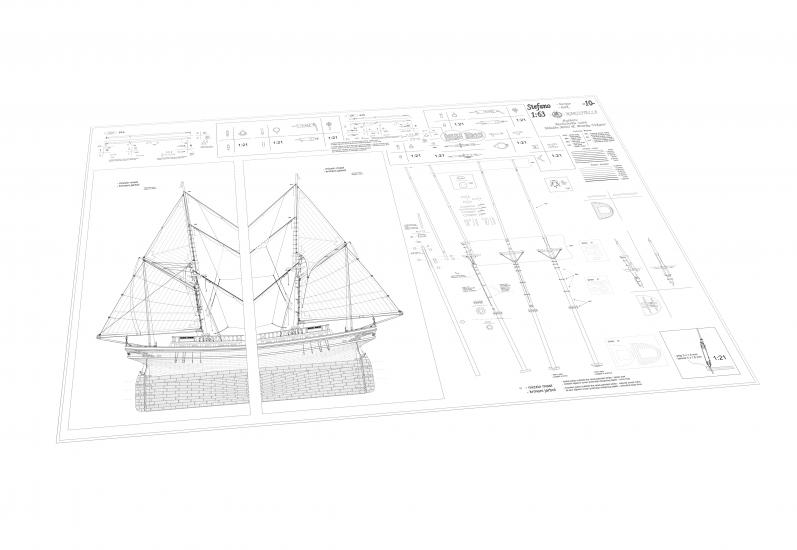
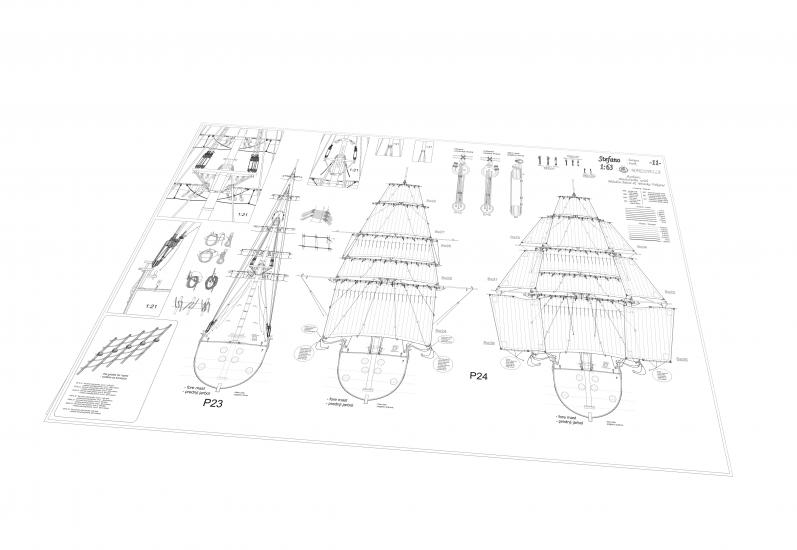
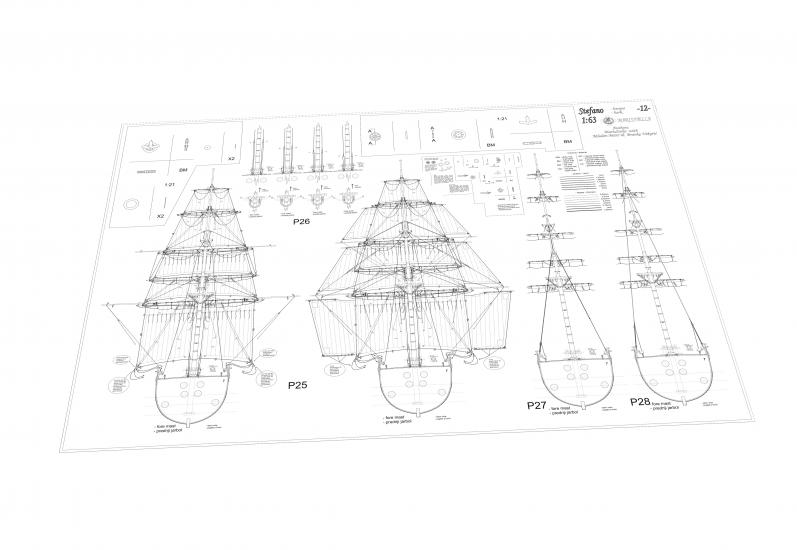
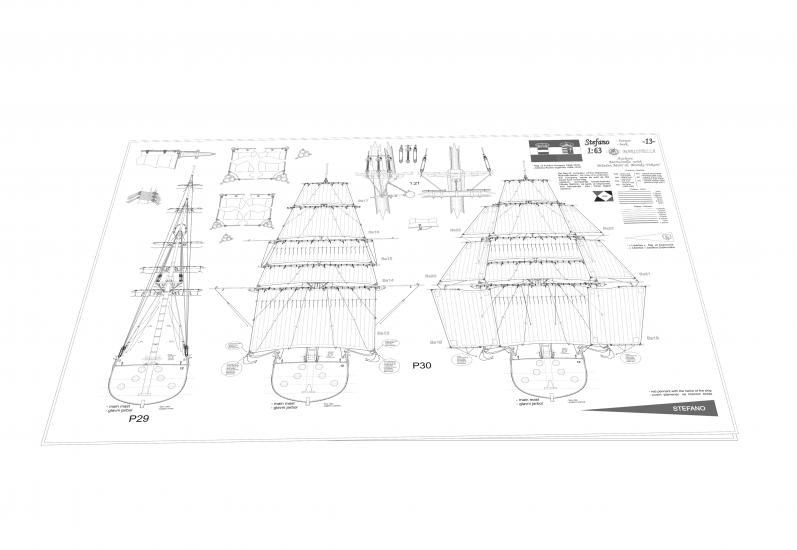
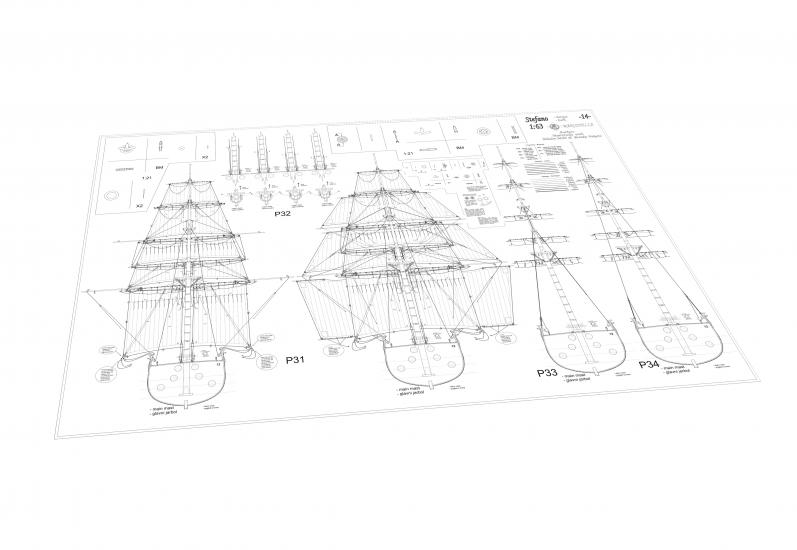
Drawings 900mm x 1300mm … 14 sheets (35.43” x 51.18”)
Extras
In addition, we offer additional parts to make a better model. These parts can be purchased with the kit. They are:
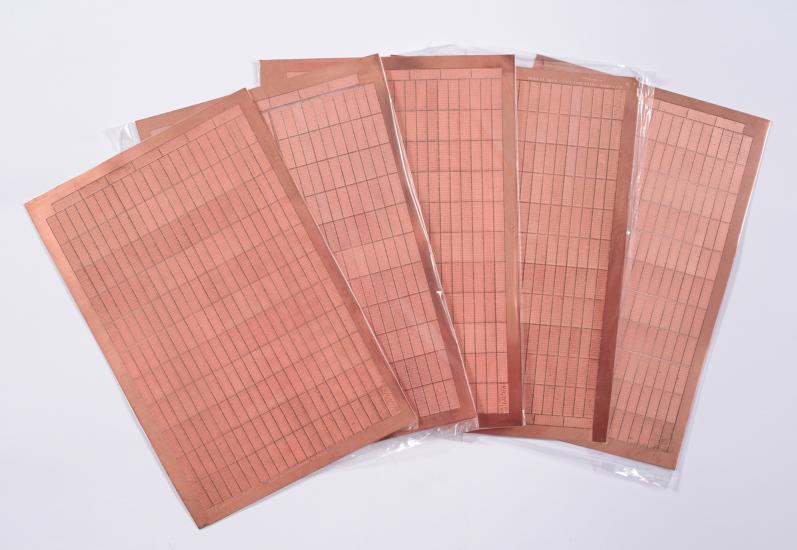
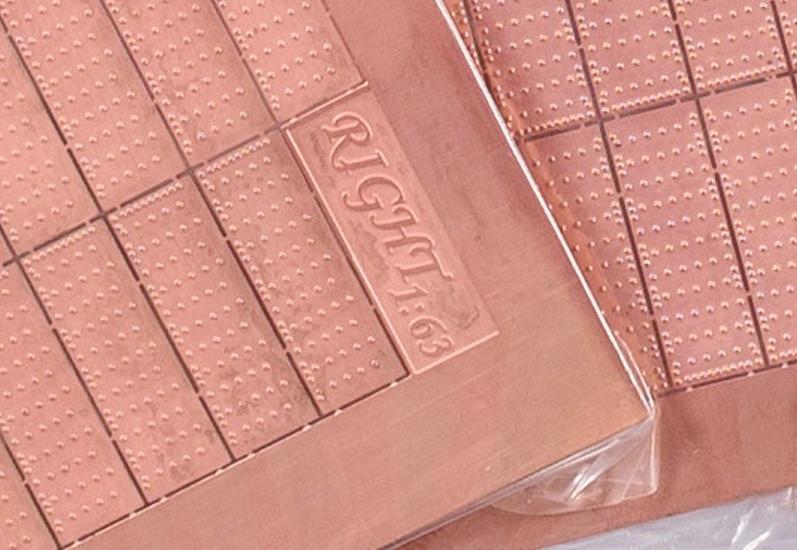
Photo etched copper plates placed onto 5 sheets…. 20cm x 30cm (7.87” x 11.81”)
The Drawings
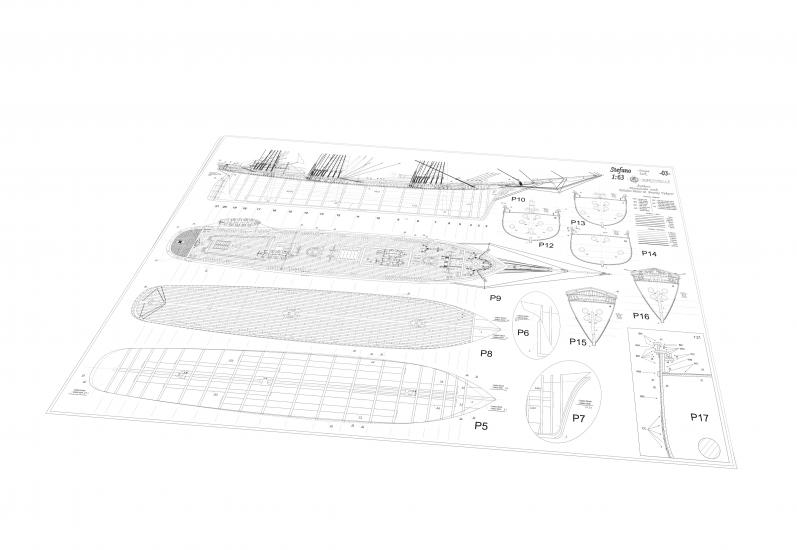
All MariStella models are based on the most accurate drawings we can find and we research the projects extensively to be sure the drawings as accurate as possible. Therefore, reading the drawings is extremely important when making MarisStella models.
The laser lines are taken directly from the drawings and we have found that they are a perfect fit to the drawing. When the model is assembled it should fit the drawings perfectly. If your parts do not fit, you should check your parts against the drawings. This may mean that you have to remake the part, so it fits the drawing.
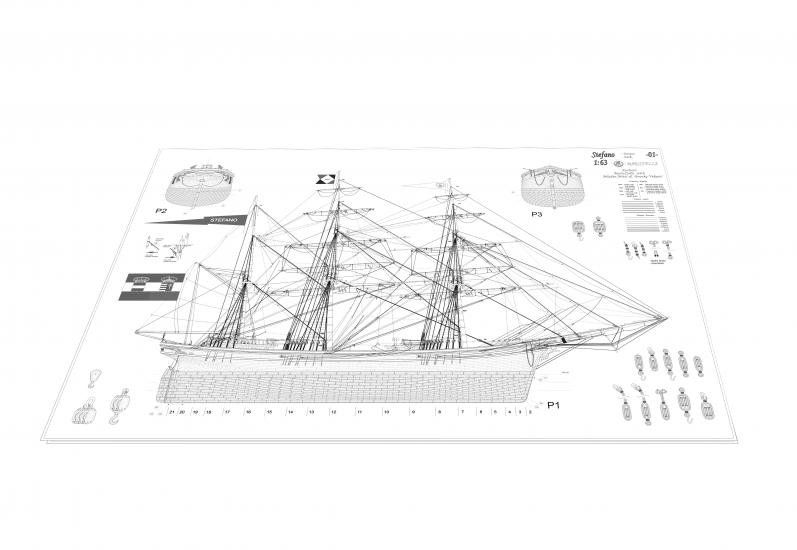
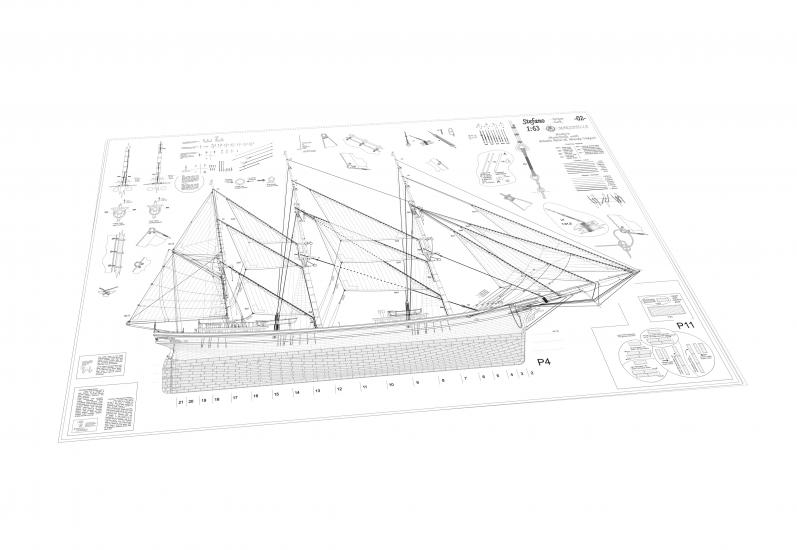
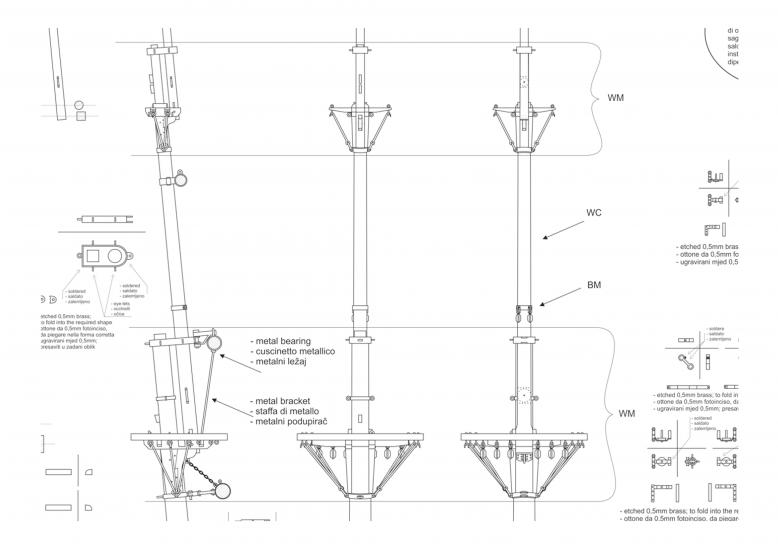
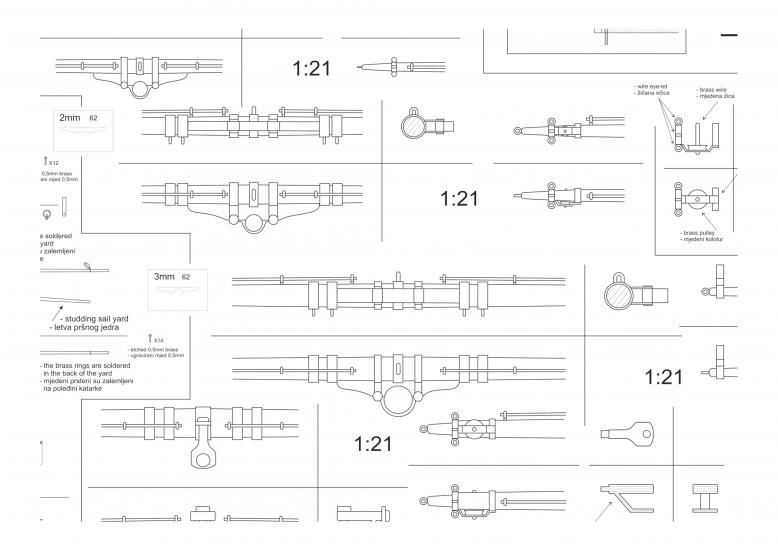
The rigging drawings show the details of Barque Stefano. In various places on the drawings, we show details in a larger scale to enable you to build them accurately. On the Barque Stefano drawings, we show two rigging schemes: one for the standing rigging (sheet 2) and one for the running rigging (sheet 1). Both schemes are scaled exactly to the model scale.
The color scheme is shown in the drawings. It shows how each part is correctly painted.
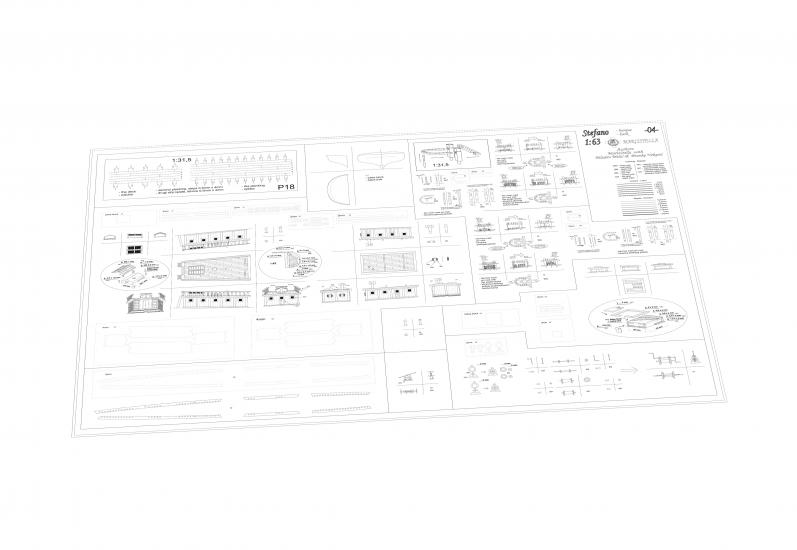
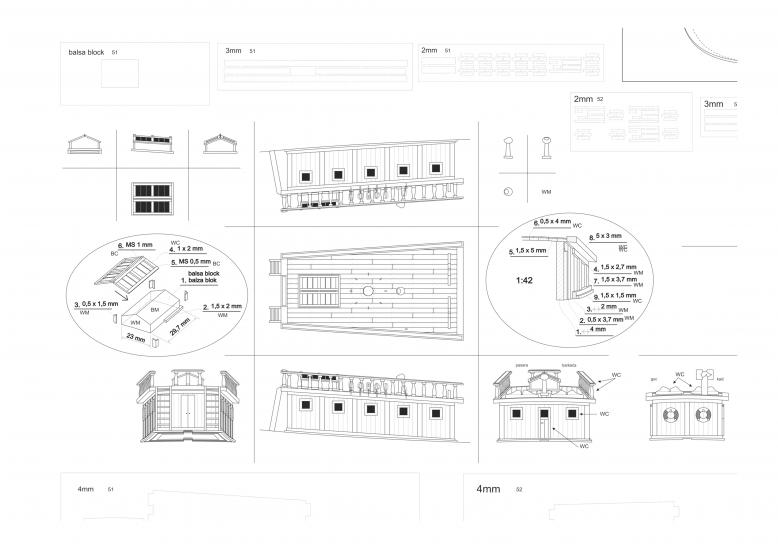
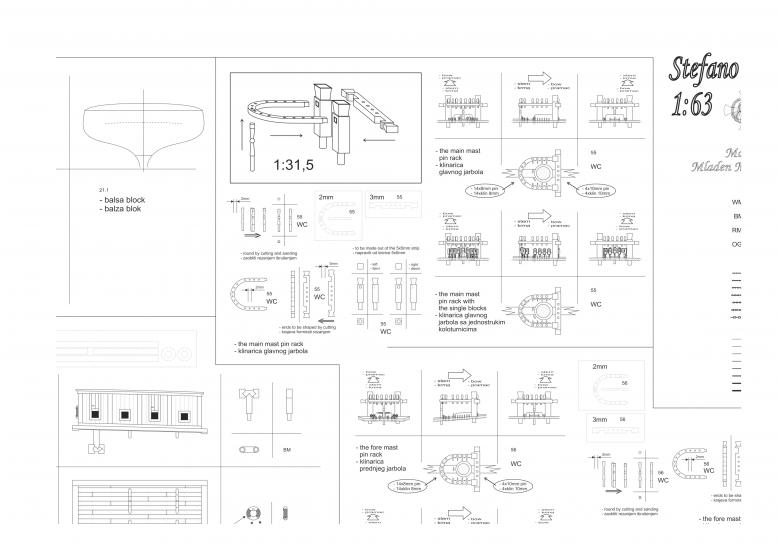
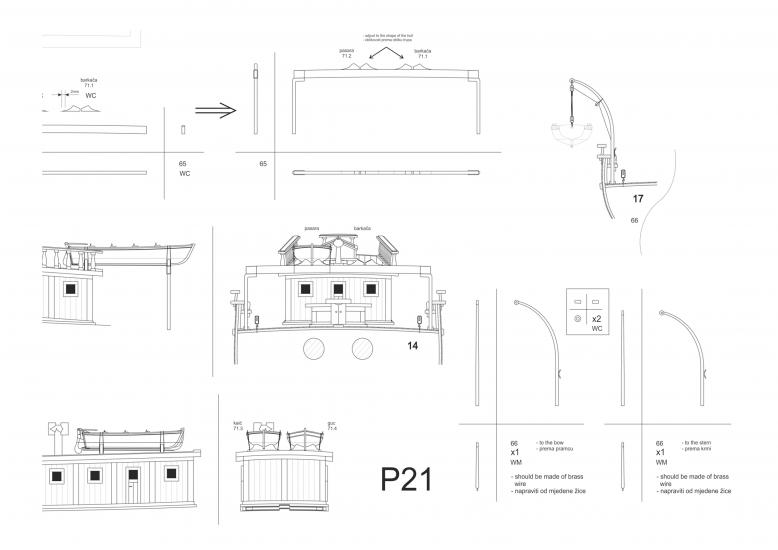
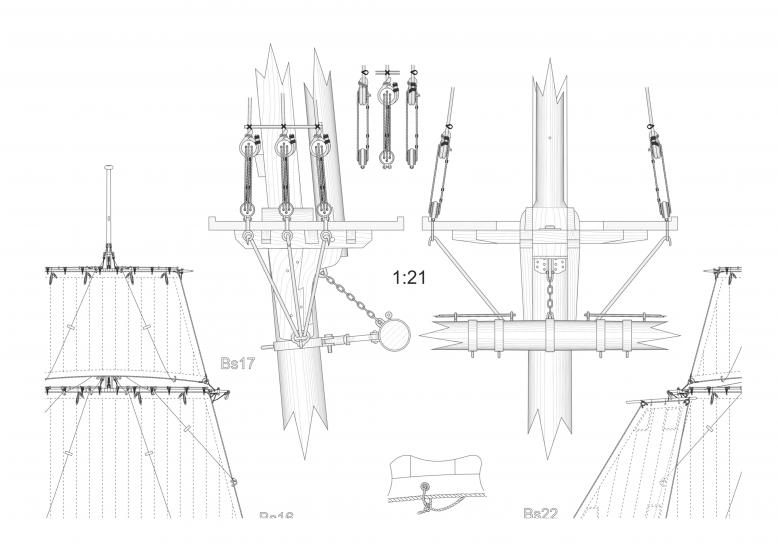
Wherever possible we show at least three views of each part. Where possible we include a three-dimensional drawing of the parts. These are included to help less experienced modelers read the drawings accurately.
Each part of the model is drawn. Here are just a few examples.
An Intermediate Level
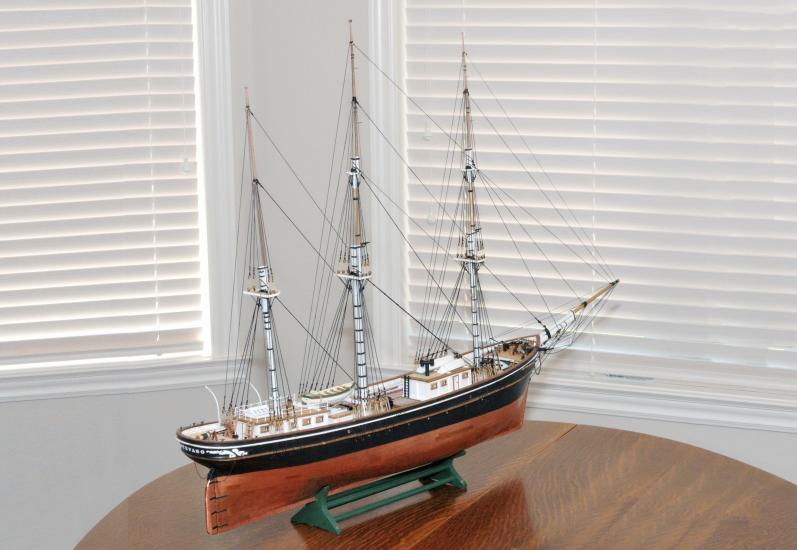
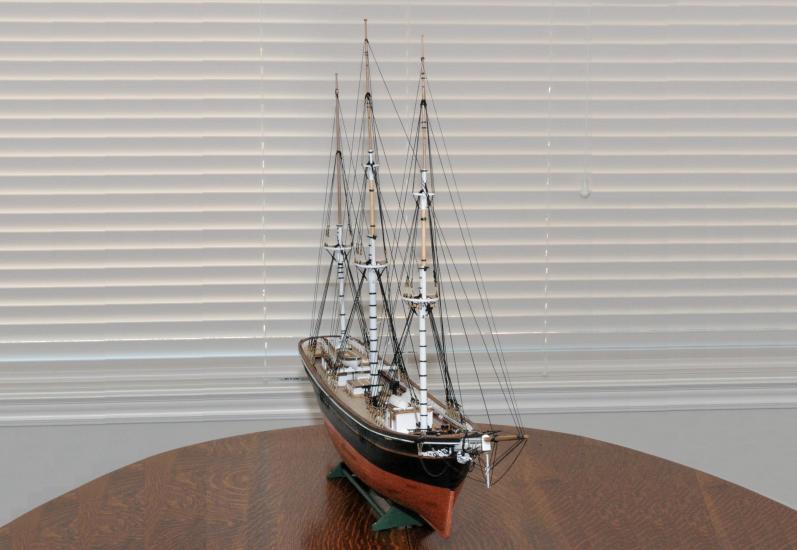
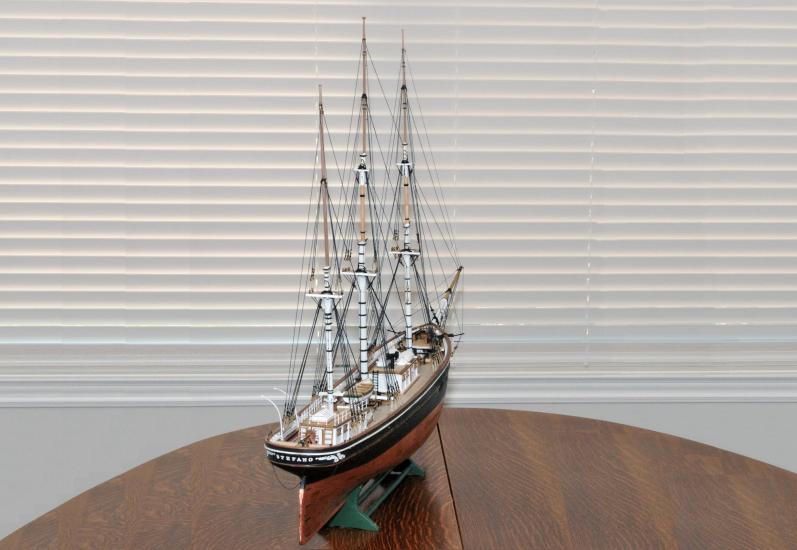
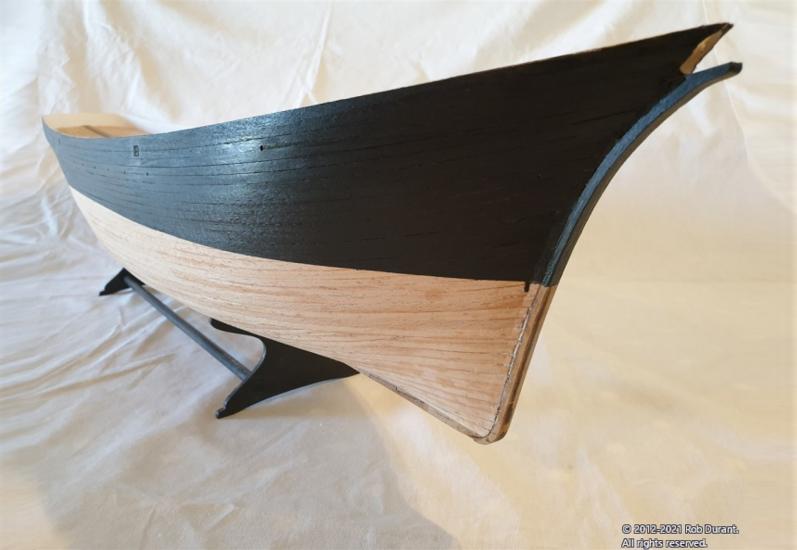
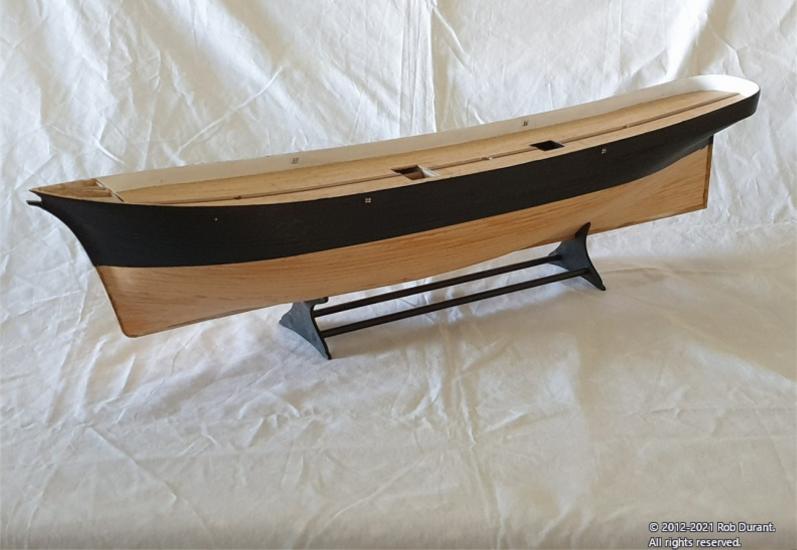
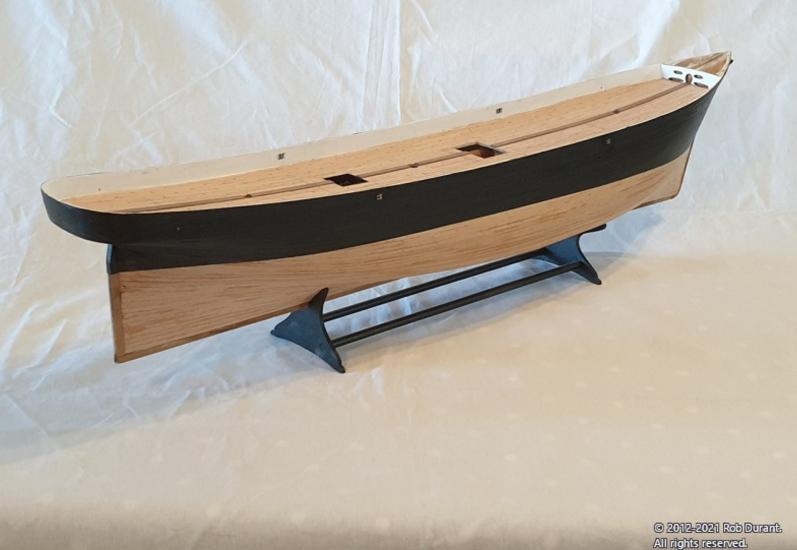
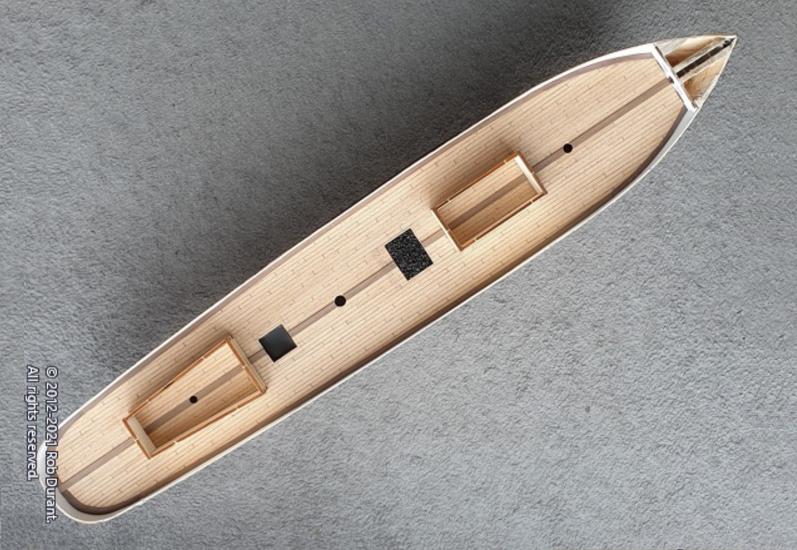
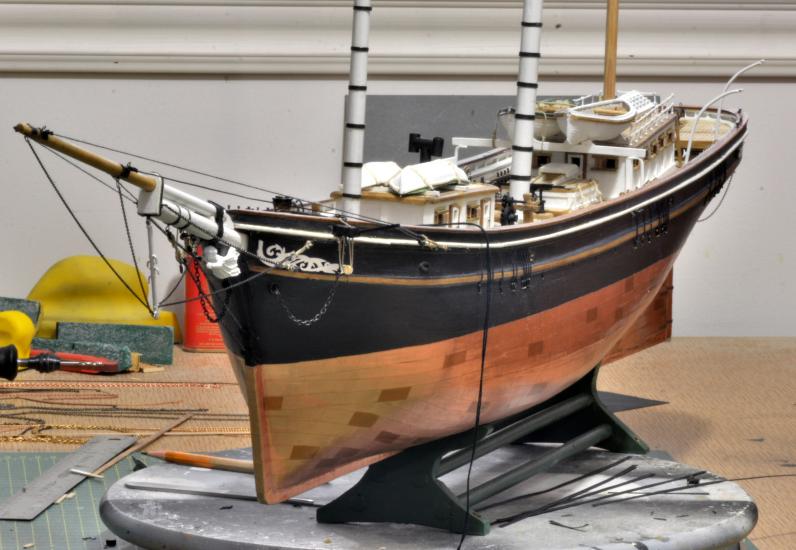
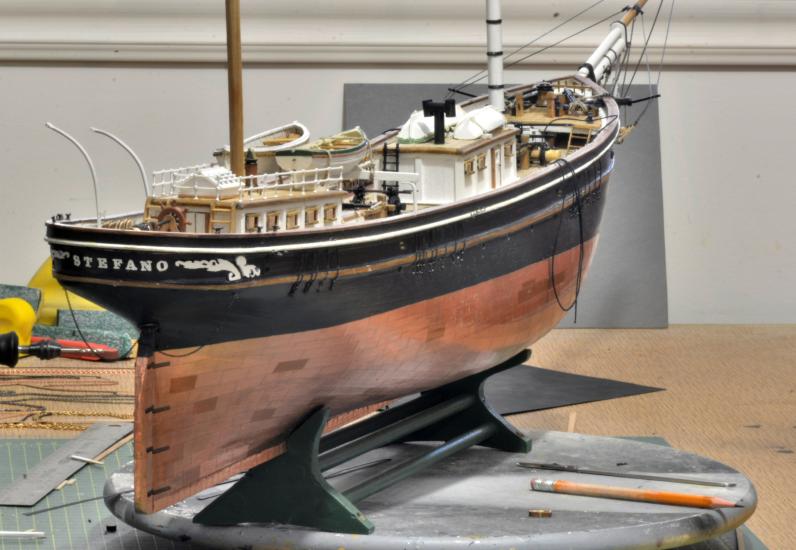
Here I would like to show you a model of Barque Stefano. This model is done by an intermediate level, but experienced amateur modeller, with no help from MarisStella. We feel this is important to mention, as he worked solely from the drawings and illustrations. The modeller’s photographs are not professional grade, but they show how he built the model. We like to think that this shows how accurate the MarisStella drawings are and how accurate the photo-etched and laser-cut elements agree with the drawings.
As it is mentioned, in our kits, no extra materials are needed. The materials in the kit are more than enough to build this model…
Modeling Barque Stefano
While preparing these materials we decided to show photographs of a few different models made by different modelers. Some are done by experts and the others are done by intermediate skilled modelers, so you can see that this model is not hard to build.
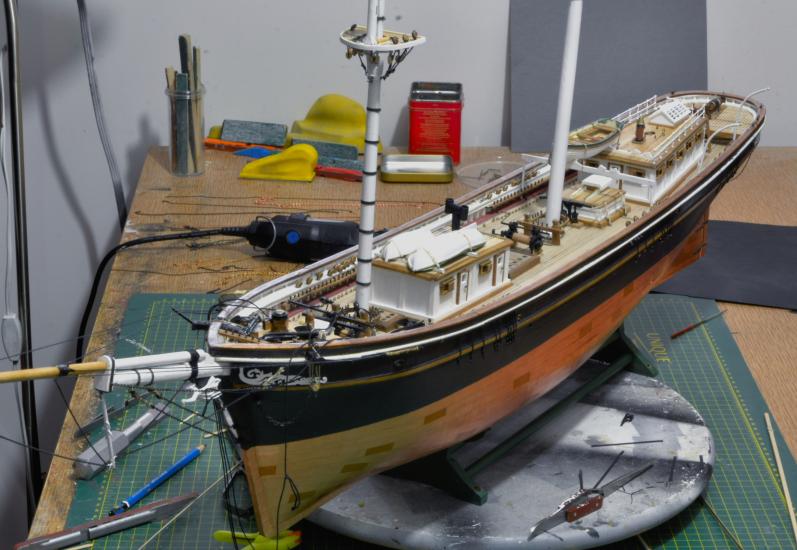
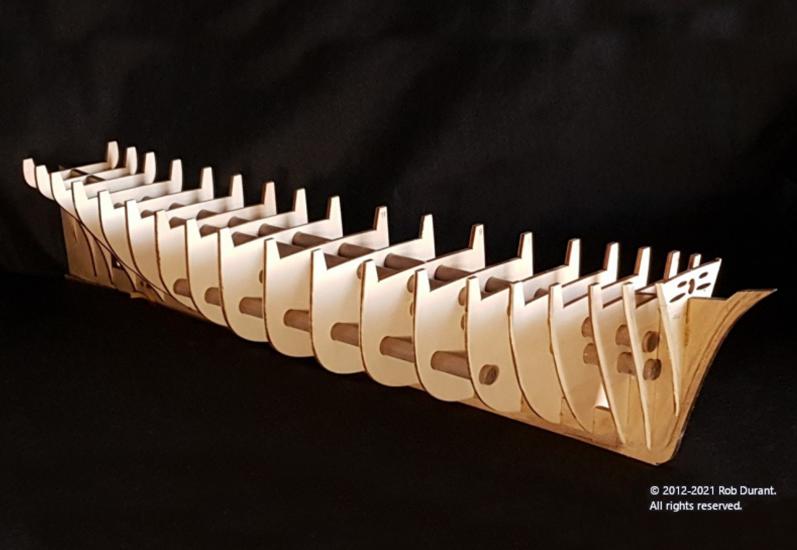
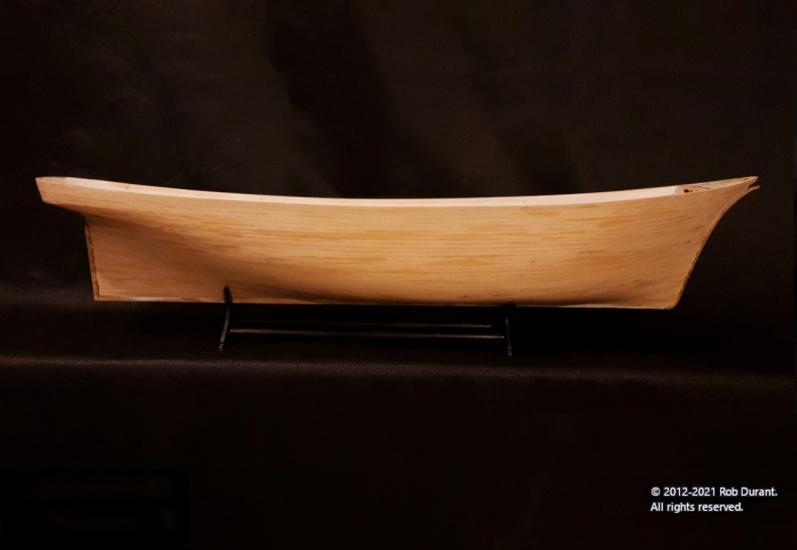
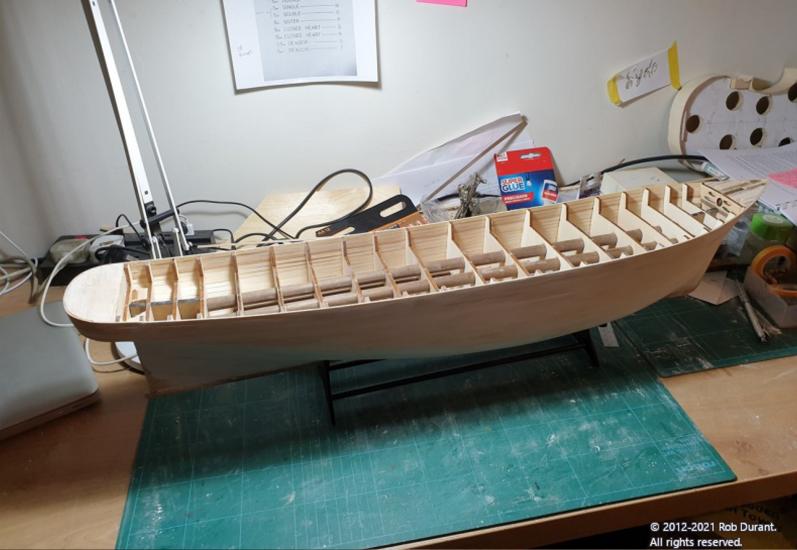
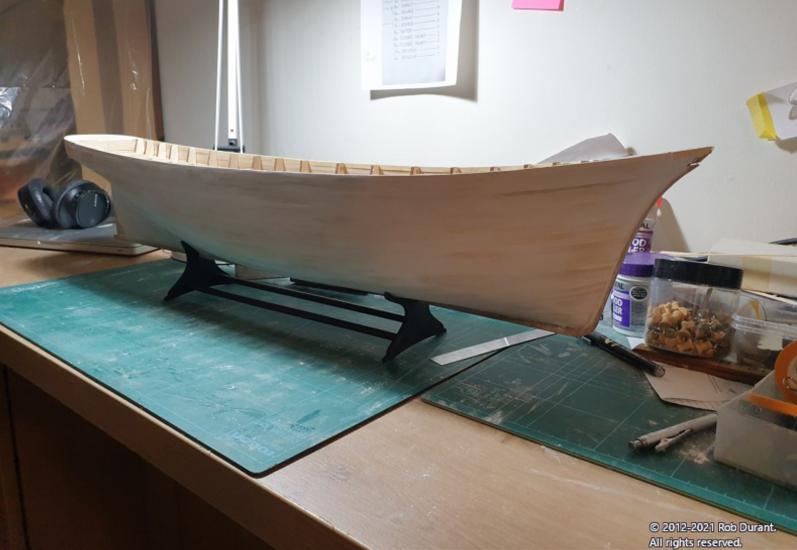
The complexity of this model is the number of parts that must be made, not the experience or tools needed to complete it. This is real ship modelling. All you really need is time and effort. Figure below shows the model partially constructed.
Construction (the first MarisStella’s innovation)
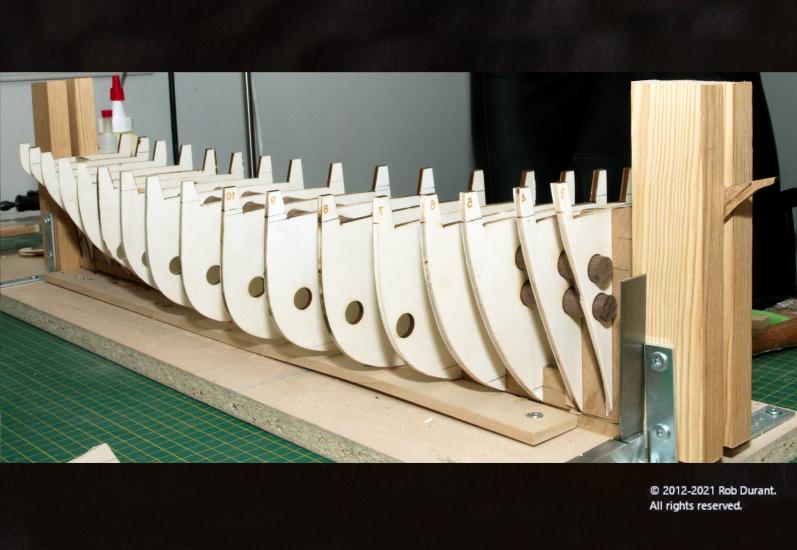
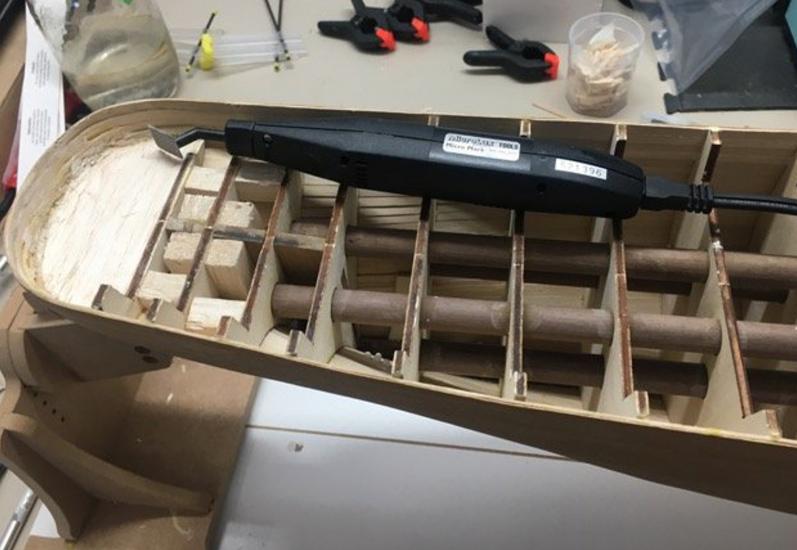
When you start this model you will notice MarisStella’s innovations. One of our first innovations is the use of dowels to align the bulkheads easily and very accurately. The dowels are completely hidden when the model is complete.
The first step is to build the walnut laser keelson. We recommend that you lay it on a pane of glass to be sure it is perfectly straight. By using glass, you will not glue the keelson to the glass, like you might do with a piece of plywood.
When the glue has set, construct the laser-cut walnut keel on a pane of glass. It should be clamped carefully. When the glue has set, check to be sure the keel unit is perfectly straight.
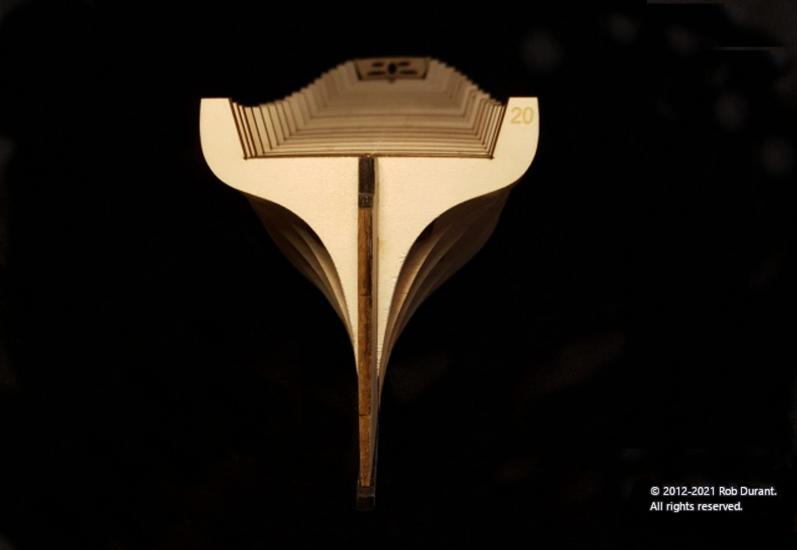
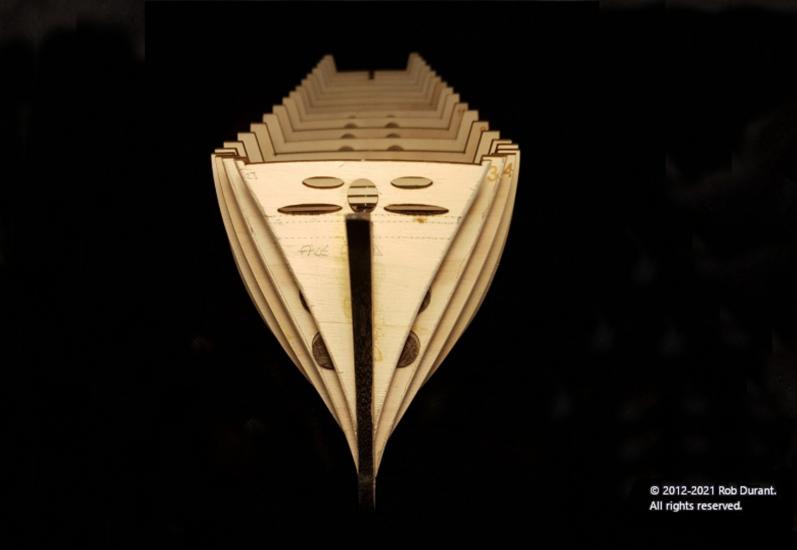
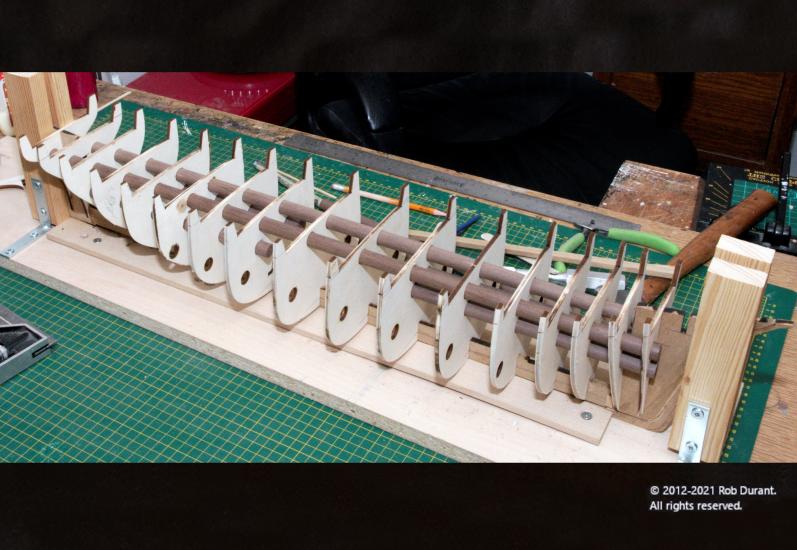
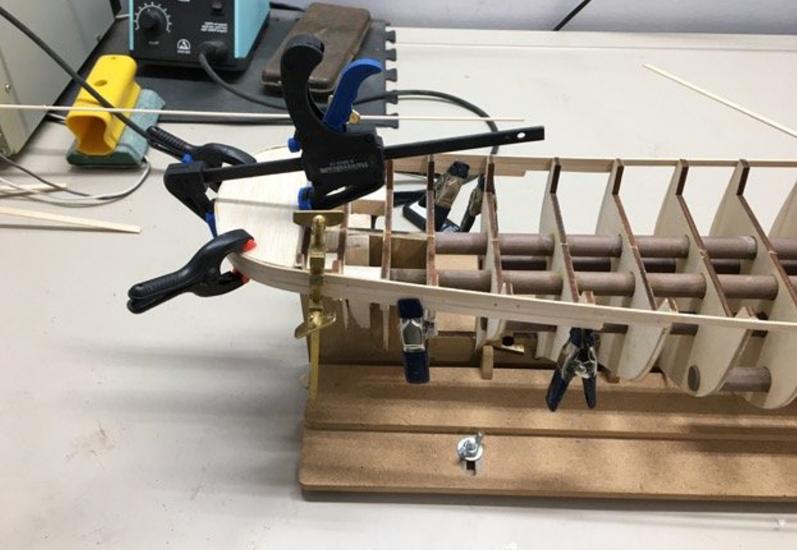
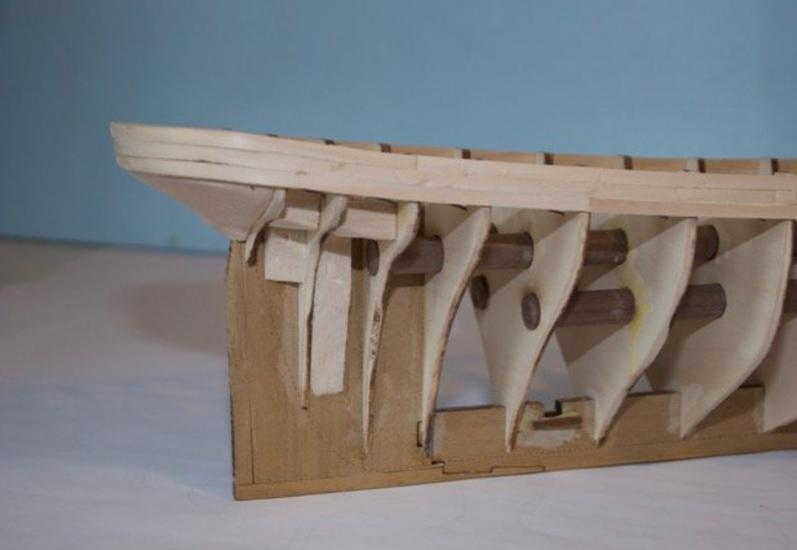
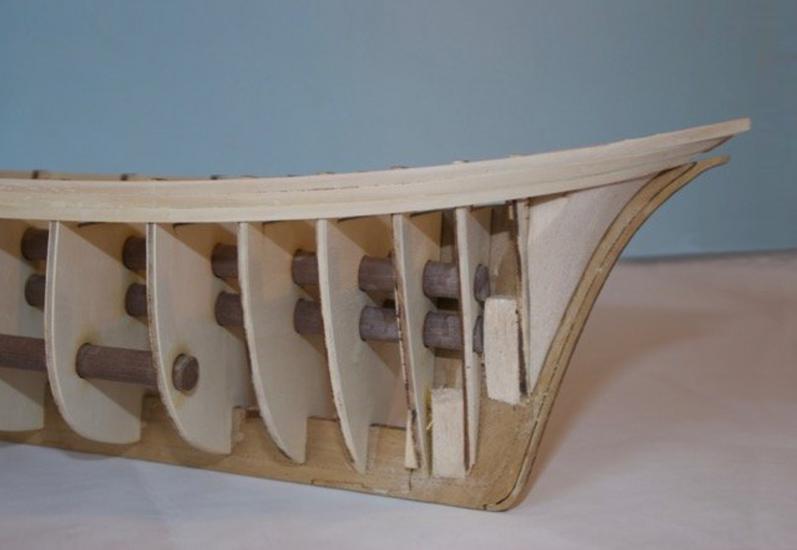
Now push the bulkheads down onto the keel. The bulkheads are numbered and when set on the keel, they should be checked to ensure they are perfectly vertical to the keel. Next push the dowels through the bulkhead and check again that you have not distorted anything. At this point you can brush glue into all the joints and leave the glue to set up. The figures below show the construction.
Work Stand
To get the most accurate model build a work stand. This can be done by selecting a perfectly flat piece of scrap wood (plywood distorts the least). It should be as long as the keel with space at each end to clamp the stem and stern posts. On the base, glue or screw two strips of wood about 4 mm high and exactly the width of the keel apart. Before gluing push the keel into the gap to be sure it fits. Build a vertical clamp for both ends of the model as shown below. This work stand will hold your model firmly while you work on it.
Beveling
About beveling and hull planking at the bow. Most old-sailing ship models, until the arrival of the clipper ships, have rounded bluff bows. At the time, the thinking was to carry the ship’s beam well forward to allow for the weight of bow cannons. For ships built after the arrival of the clipper ships, this is not always the case. On a lot of ships the bow becomes sharper below the waterline and often creates a slight vertical concavity just abaft the bow. Planking this part of the hull is often quite difficult in that the planking needs to sweep upwards somewhat to get the correct shape. In real vessels the planking is tapered at the bow (and often, at the stern), to allow the planks to sweep slightly upwards. This tapering is known as ‘spiling’ in English.
About beveling in general
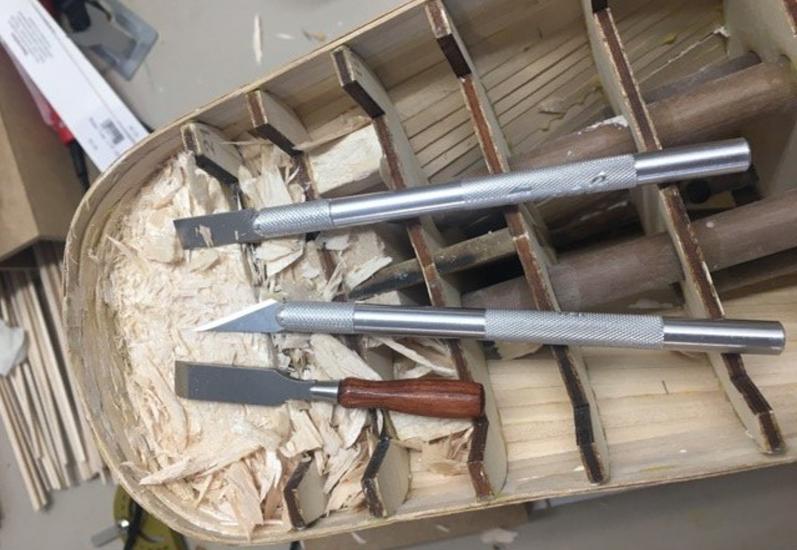
Beveling is a very important process in building an accurate ship model. The second, the third and the fourth bulkhead on the bow are very sensitive locations for beveling on every ship model. A lot of caution is needed while beveling these bulkheads. Take off too much wood and deformation of the hull lines can often occur. If you sand off too much wood, you may need to glue a thin strip to the bulkhead and resand the bevel, or build up the hollow with a little plastic wood.
To bevel correctly, use a long thin piece of scrap wood (sometimes called a spline) that you can bend around the bow are to ensure the beveling is done correctly. By using scrap wood (some model builders use thin strips of 1mm x 2 or 3mm plastic strip) it doesn’t matter if the spline breaks. Apply the batten in the same direction as your planking will lie. Try not to remove too much wood or distortions can occur. Check the bow shape constantly and sand away any bumps. You may have to fill hollows if you have sanded too much off. Beveling is complete when there are no bumps or hollows in the bow area.
When sanding, use sandpaper on a wooden block that spans at least two or three bulkheads to get a smooth, fair surface. Temporarily pin flexible ‘planks’ or battens to the bulkheads to ensure you have the entire area sanded smoothly. The battens will also serve to hold the bulkheads in place while you sand. Remove the pins and battens when you are about glue the planking in place.
Balsa Wood Blocks
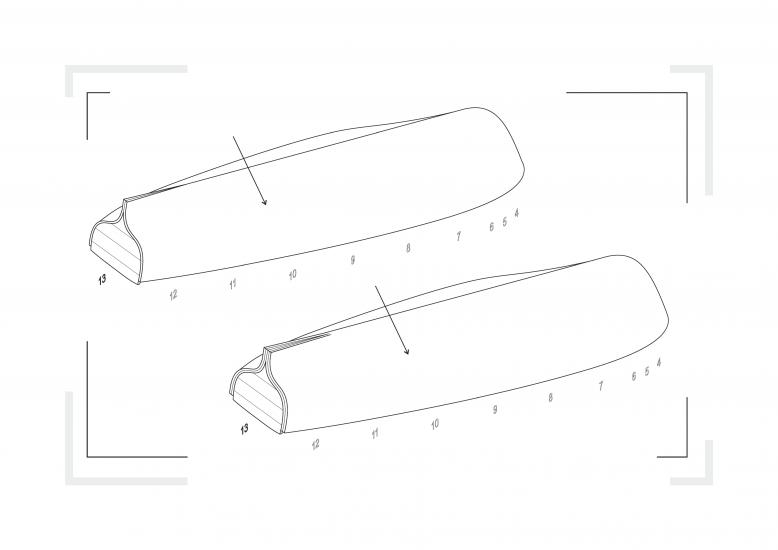
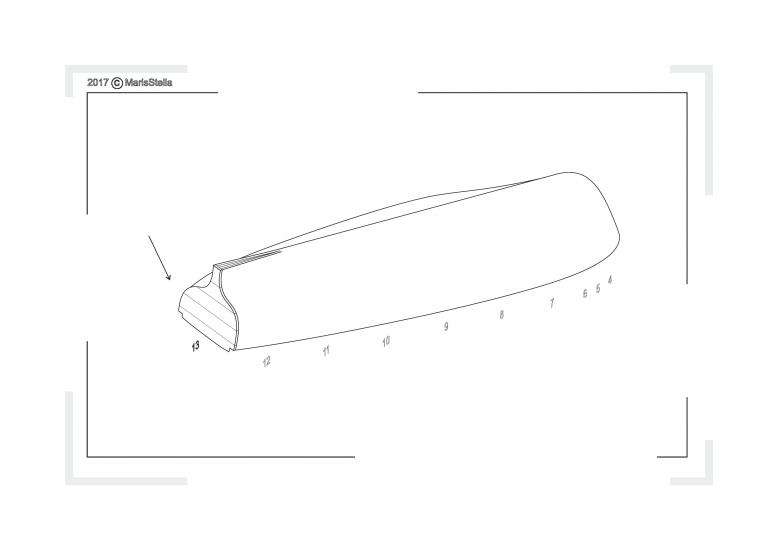
Another MarisStella innovation is how we shape the bow and stern. By adding easily sanded balsa wood blocks at both the bow and stern, planking can be laid over the balsa to obtain a perfectly shaped bow and stern. After the planking is done, the stern balsa block will be removed, and the planking will have formed a perfectly rounded stern. This is the second MarisStella’s innovation.
At the bow, the balsa wood block will stay in the model. Only after both balsa blocks are set in place and shaped to suit the model, should the planking begin.
Planking, the first layer
There are strips 1,5x5mm supplied with the kit. They are the first layer of the planking.
This model is easy to plank. This is because it is double planked model. The only point on the hull that could cause some problems is the round stern. But the planking strips on the stern can be cut into shorter pieces, 15cm to 20cm long. This way the planking of the round stern will be simplified. You can also soak the planks in hot water to make them more pliable and when they are moist wrap them round the stern, pinning them in place until the wood has dried. After the glue has dried, brush the seams with glue to fix them in place.
When the first layer of planking is complete, sand it, fil the cracks with wood putty. After some more sanding using finer and finer grits of sandpaper the hull should be close to perfect and ready for a second layer of planking.
Planking, the second layer
Strips 0,5x4 mm are to be used for the second layer of the planking. Depending on your skill level, the final look of the planking can be highly realistic.
The Deck (the third MarisStella’s innovation)
In ships such as Stefano the deck usually curves both fore and aft and transversely. Fore and aft to closely match the sheerline and transversely it has a camber to allow water run off when at sea. For the model builder this presents a problem in that wood prefers to bend in only one direction.
At Maris Stella we solved this problem with another innovation. In this kit the bulkheads are planked fore and aft with 1,5x5mm planking strips to form the deck base. All that needs to be done is to bevel the tops of the bulkheads to suit the sheer curve and to prepare for deck planks. This base layer should be planked, then sanded and if needed, treated with wood putty, then sanded again.
A second layer of 0,5x4mm strips comes on the model. This second layer can be done highly realistically depending on the will and skill of the modeler. Special care will have to be taken to ensure the king plank (the Centre plank) and the margin planks (edge of the deck) are cut correctly.
Coppering the Hull
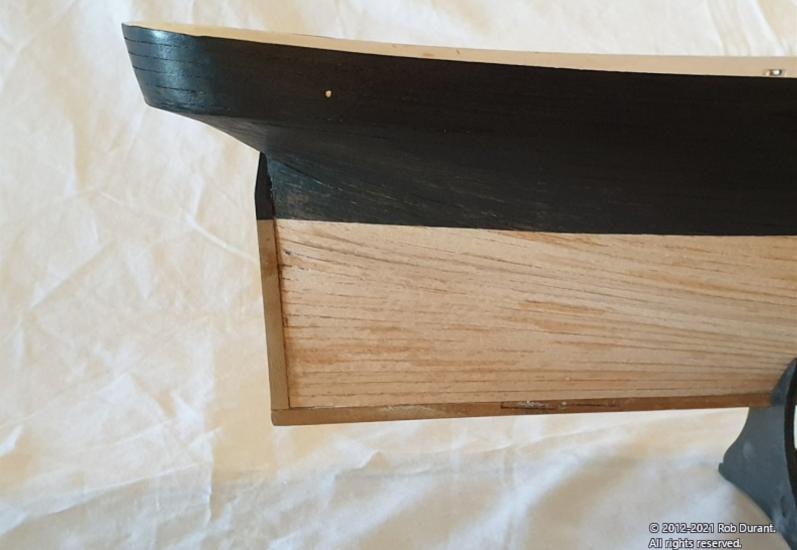
After the deck is completed and the hull is painted matt black above the waterline, it is the time for the final work on the hull, that of coppering the bottom. This is to be done from the water line downwards toward the keel.
Before starting, you should decide if you want to copper the hull with the copper plates or paint the hull. The color to paint the bottom is definitely your choice, but the more common style is to paint the bottom white (to emulate the tallow and white lead often used in ships of this time) or paint it with a copper paint. Note that copper-based anti-fouling paint did not come into general use until around 1900). The third option is to keep it simple and leave the underbody in natural wood.
If your choice is to copper the hull, you can use a copper sheet, not thicker than 0,1mm to 0,2mm. Cut your copper plates to the right and glue them onto the model.
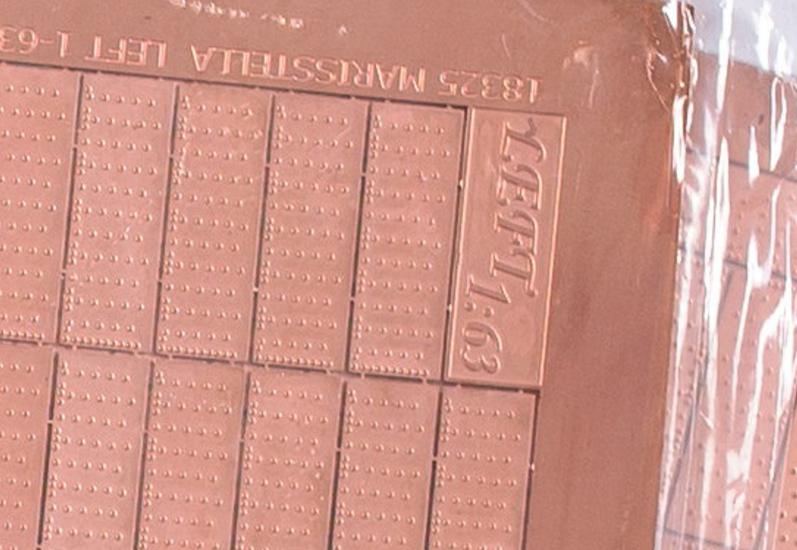
In the kit you will find our photo-etched copper plates. There are the photo-etched copper plates made for the port side, marked ‘Left’, and photo-etched copper plates made for the starboard side, marked ‘Right’.
Before installing the copper plates, it is very good practice to draw a pattern of the copper plate arrangement on the actual hull underbody. When this is done carefully, installing the copper plates will allow you to see where they need to be tapered slightly before installation and will become far easier.
Coppering the hull is done by starting from the uppermost copper plate on the edge of the stern post, running down and going along the edge of the keel, finishing on the uppermost copper plate on the edge of the stem post. Then copper the hull sides, starting from the lowermost copper plate in the bottom of the stern. But, when coppering this way be aware that this method does not consider the overlapping of the copper sheets. Using this method, the copper plates have to be trimmed to fit the space to enable you to fit the rest of the copper plates.
Completing the Model
After the hull coppering, the model is ready to be set onto a decorative stand permanently. It is very good to create a thick solid wood well decorated model stand. This model deserves it. A thick solid wood decorative model stand is not supplied into this kit because it is heavy and would affect the price of the shipping a lot. The stand on these photographs is the stand supplied into this kit, it is easy to construct. The lettering is photo-etched and is usable in many other combinations. There are two photo-etched lettering plates supplied into this kit.
Completing this model from now on is a very pleasant but time-consuming process. The rest of the elements are not demanding to make, but there are quite a lot of them. When they are all on the deck, and on the hull, they look extremely attractive and the model looks very complex.
Boats, made the MarisStella way (the fourth MarisStella’s innovation)
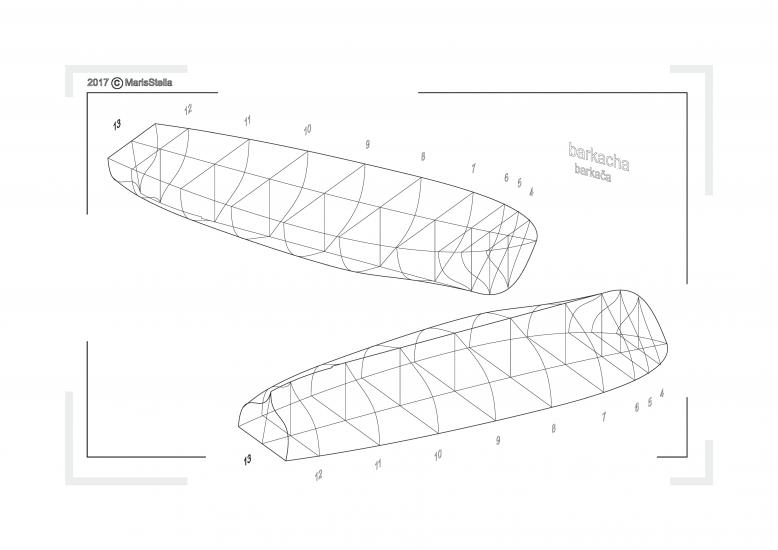
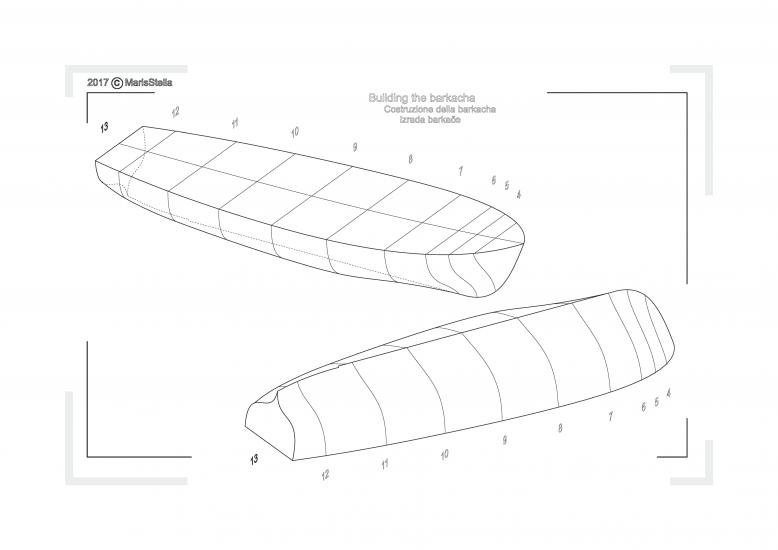
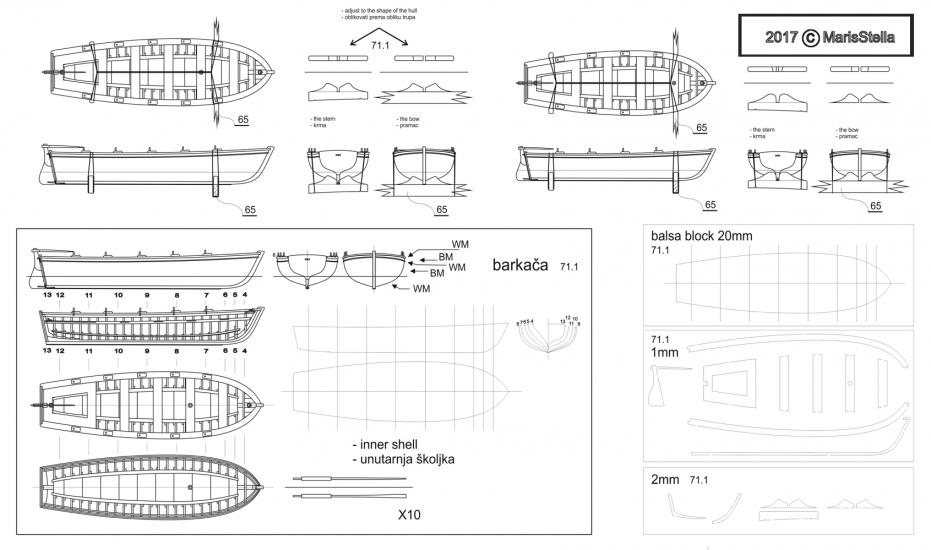
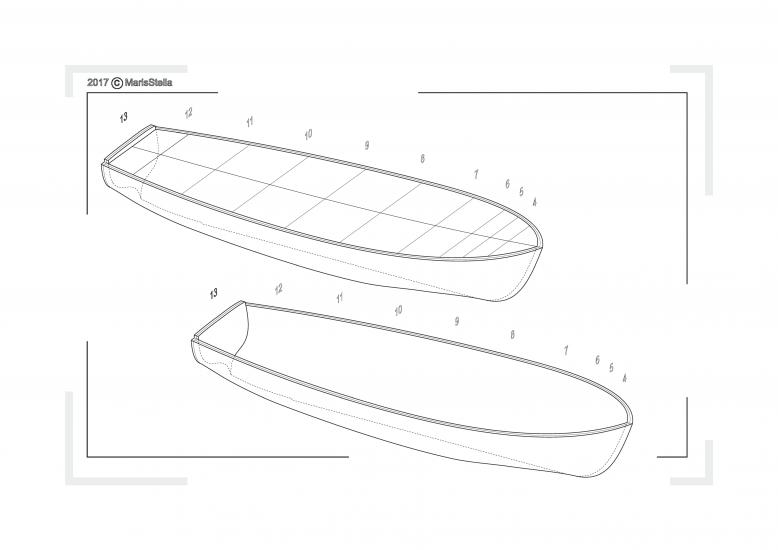
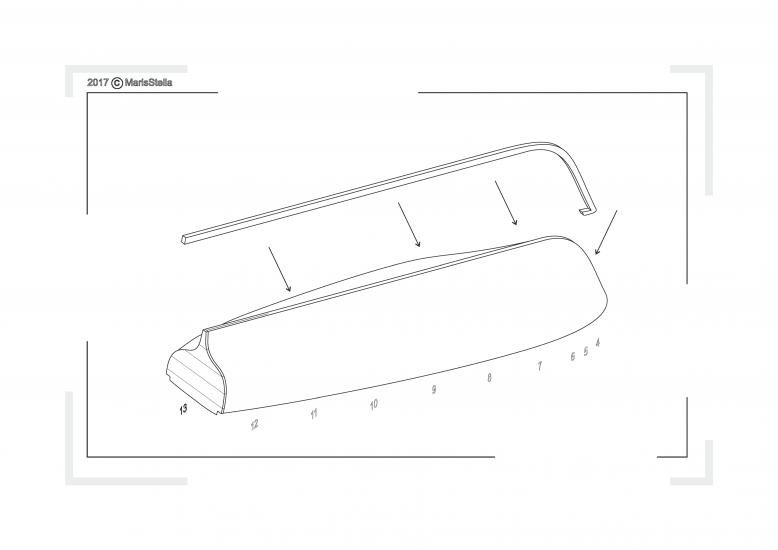
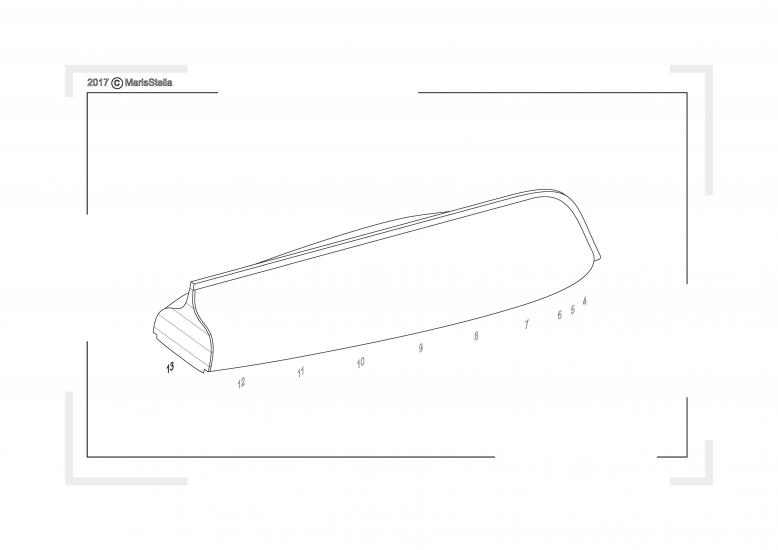
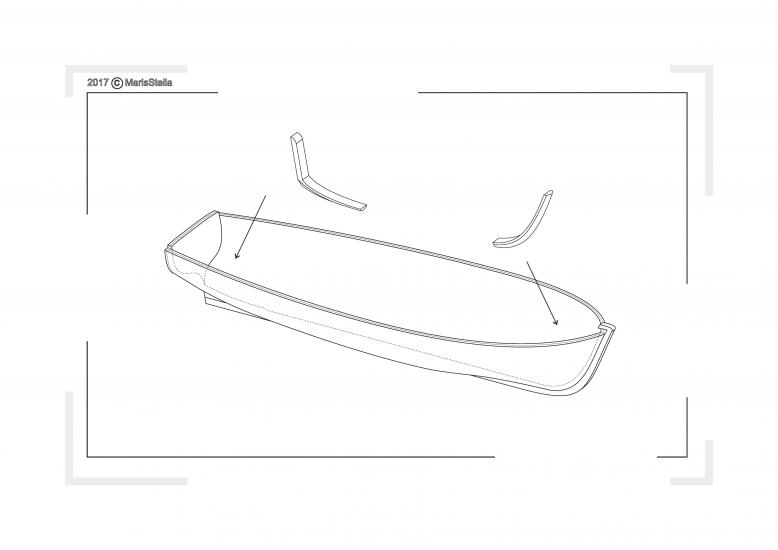
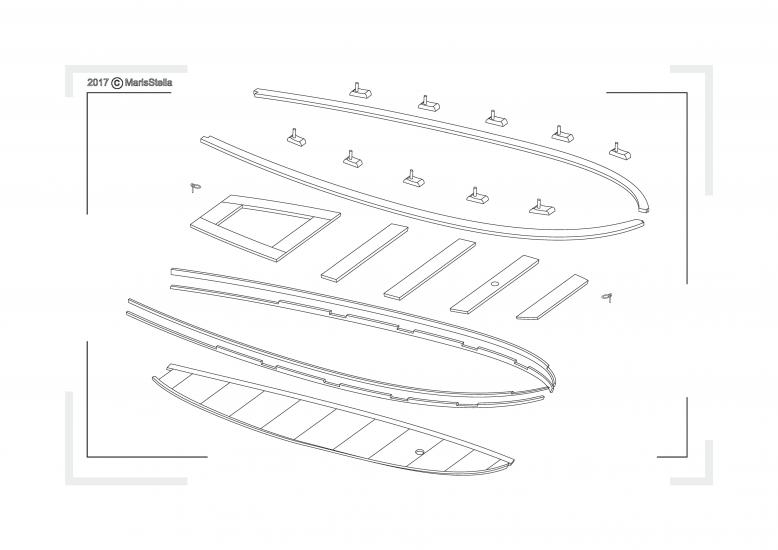
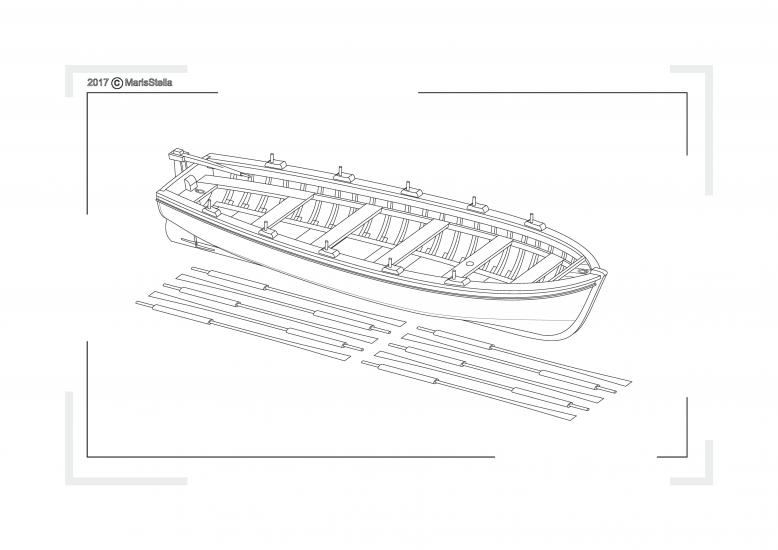
Attached is a sample of a boat from the barque Stefano made the MarisStella way. The boat is realistic and in scale. Making the boat mold is the most important part of the job. An accurate mold makes for a realistic model longboat. These illustrations are taken from the Barque Stefano instruction booklet. We find that beginners can do this with great results. We suggest that you use one or two balsa blocks to make practice molds before you make the final one. Sections through the hull are in the drawings and we suggest that you trace them onto cardboard. They are accurate mold sections. Cut out templates to check the accuracy of your balsa carving.
First, we emphasize that this innovative method is only done by MarisStella. Using a wooden mold for creating a small boat in scale is not new. It is an old, well-known method. But in the original method the frames are set onto the mold and the planking is glued over the frames.
At MarisStella, we have modified this technique.
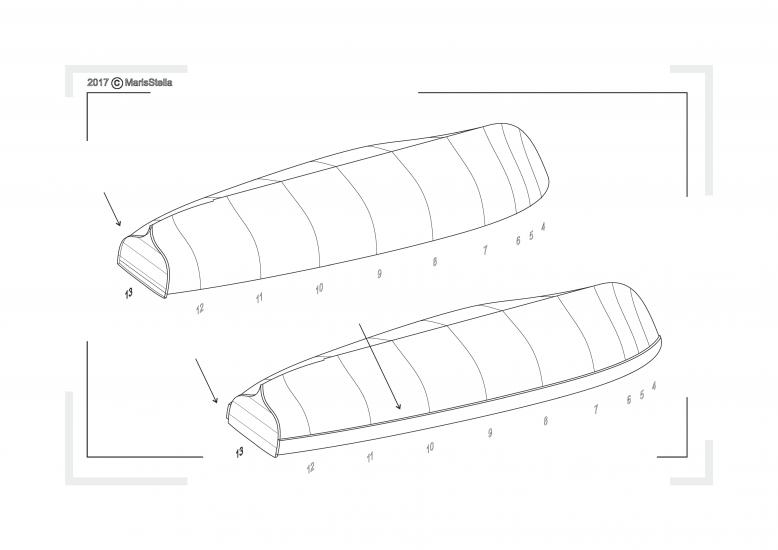
The balsa wood mold becomes the inner shape of the boat without the frames. This means that the balsa wood mold fills the entire space inside the boat’s planking. When the planking is glued onto the balsa mold, the outer planks are exactly the right scale of the boat in the plans. (The planking is two layers of 0,5mm thick strips) This is why carving and sanding of the balsa wood mold to the right scale is so important.
The lines of the boat’s balsa wood mold are shown in the drawings. We suggest that you cut out and glue together the keel and stem pieces from the kit and use them to help guide you to the exact fore and aft shape of the hull. (Barque Stefano has four different boats.)
When the balsa wood mold is finished, glue the first layer of 0,5mm thick strips over it. Because the strips are so thin, the planking is easy to do.
Note: the first layer of the planking glued directly onto the balsa wood mold. No frames are set on the mold at this point. Before the first layer of the planking is fully set, glue the transom the balsa wood mold.
When the first layer of the planking is completely glued, the second layer of the 0,5mm thick strips should be laid over it. You might have to sand a few bumps away or fill a hollow with wood putty to get the base layer perfectly smooth. The second layer of the strips, is glued to the base layer giving you the real life shape and arrangement of the planks on the boat.
The transom is to be finished after the second layer of the planking is done. Simply glue the second layer of 0,5mm thick transom over the first layer and over the edges of the planking at the stern. Sand it to the shape of the boat.
After the balsa wood mold has been planked for a second time and the transom is finished the model is fairly stiff. At this point, carve the balsa wood mold away from inside the hull leaving only the shell. Sand and polish the inside of the shell using progressively finer grades of sandpaper until you have a perfect finish.
Now the keel can be glued to the shell. You might have to sand a flat onto the bottom of the hull equal to the 1mm width of the keel and glue the keel and stem post to the hull exterior.
In a few other MarisStella projects the keel must be installed onto the balsa mold before starting the planking process. Everything else is the same no matter if you install the keel before or after installing the planking. In the Stefano project, the keel is glued onto the finished shell.
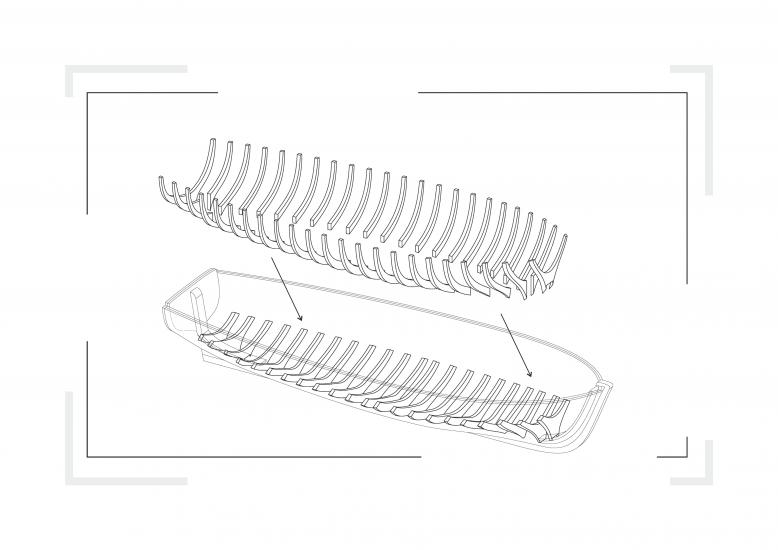
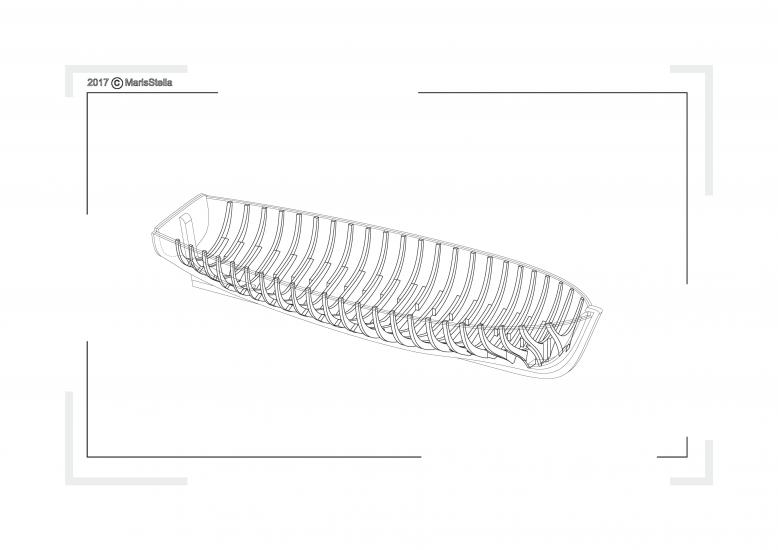
After this, all the frames are to be cut from the leftover 0,5mm thick strips and glued into the shell. You may have to soak the frames in water for a few minutes to get them to bend without cracking. Clamp them in place until they are dry and then glue them down. Where slightly thicker frames are needed, for example, in way of the mast, glue strip pieces on top of each other to build up the thickness.
When the frames are completed and glued into the shell, finish the boat’s interior using leftover pieces of wood.
Some of the elements, like the rudder and tiller, rail cap and seats are laser cut, but you can make them from wood scraps. Here is a procedure:
Start by building a rudder and tiller from wood scraps. The rudder is held in place by inserting two metal pins with rings in the transom. Metal pins in the rudder allow it to drop into place and turn easily.
The rail cap is curved and will need to be cut from long scrap pieces to suit the shape of the top of the rail. Simply lay the boat upside down on the scrap wood and trace the edge of the rail staying about 2 or 3mm away from the rail. The rail itself is about 2,5mm wide so mark it on your scrap wood and cut it out leaving plenty of material outside your pencil lines. Glue the rail in place and sand off the excess material until you reach your pencil line or the rail cap is the perfect width.
Next add the bottom boards. These are made from 4mm scrap wood glued to each other and cut to the shape. Add one more board on each side made from 4mmx 0.5mm scrap wood strips. You may have to taper the ends of the boards to suit the hull curvature. You will need to add risers on both sides of the boat on which the seats are placed. The risers are made from 4mmx0.5mm scrap strips and are placed about 2mm lower than the rail cap. They will need to be glued and clamped into place. Your last job is to cut the seats to fit and glue them on top the risers. We found it easiest to paint the cap rail, risers, and seats before installation to get a nicer paint edge.
This will finish the interior of the boat. Make six- to ten-oars by shaving down 1.5mm or 2mm scrap wood and painting them before putting them in the boat. Oarlocks are made from scrap wood and wire, by drilling 0.25 mm holes in the rail cap and inserting 0.25 mm dowels or wire in the holes.
This way you get a high realistic boat to the right scale.
The sails (the fifth MarisStella’s innovation)
To continue this blog, follow the link:
Modeling Barque Stefano, The Sails
To the shop gallery, Barque 'Stefano' 112,1cm 1:63:
Barque Stefano 1/63 Model Ship Kits MarisStella
SOURCE: MarisStella projects
VISITS: 6000


