08.06.2021. | Our products
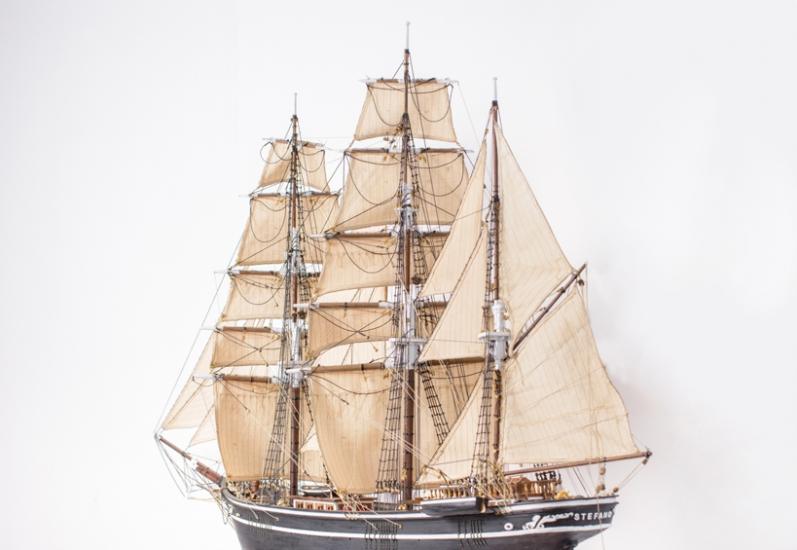
Barque Stefano 1/63 scale 44.13`` 121.1cm Model Ship Kits MarisStella
Modeling Barque Stefano
The Sails
The sails (the fifth MarisStella’s innovation)
The sails are pre-sewn on the fabric, embroidered to look realistic.
You can leave the sails as they are without adding Linings or you can add the Linings. Add the boltrope for a more authentic look.
Definition of the Linings: the canvas sewed on the leeches and middle of a sail to strengthen it. Types of the Linings: Leech lining, reef band. Position of the Linings on the quadrilateral sails (on the principal sails and on the studding-sails): on the aft-side of sail. Position of the Linings on the driver and triangular sails: on the port-side of sail.
Cutting the Sails and Linings:
Cut the sails including the hem edges. Cut the Linings by your own design.
Process of cutting and folding the sail edges (The Selvedge):
If you use a special glue (In America, white glue seems to work best and stays reasonably flexible.) Apply the glue along the edges, cut the sails and fold the edges over. Some modelers iron the folded edge to be sure it stays folded over. If you happen to cut a ragged edge, use a pair of very sharp scissors to trim the cut edge. When dry, trim any rough spots with a pair of sharp scissors.
If you use a wood glue, such as Pattex by Henkel, dilute it with water and apply it with a brush over the edges and, when dry, trim with sharp scissors.
Hem the Sails once or twice:
If you do not use the Linings, we suggest that you hem the sails by folding the hem twice to hide the cut edge, gluing and ironing it to ‘fix’ the folds in place. If you use the Linings on the sail leeches, you only need to hem them once.
Process of gluing the Tabling and Linings:
If you use a special glue for fabric apply the glue to the both surfaces to glue and glue them together.
If you use wood glue, as Pattex by Henkel, dilute it with water, apply it with a brush over the both surfaces to glue. When dry, press the surfaces one to the other with a very hot iron. The glue will melt and unite into one whole when cold.
Saw the seams along the Tablings and Linings so the sails look realistic. Use a needle and a thin thread.
To sew the bolt-rope and cringles to the sails, use a needle with a large eye. Sew the sail clew using a needle and thin thread. Sew the reef points by sewing them through the sail and tying an overhand knot on both sides of the sail fabric.
Conclusion
With this story of sails, we end
the review this assembly kit
. We sincerely hope you found it interesting and, above all, instructive.
We’d like to thank our friends and other modelers who allowed us to use their valuable and unique materials.
Now it's your turn, build your own model and put it in a glass case so that your children and grandchildren will have a unique model that illustrates the best in sailing ship design.
You will not regret it.
Best regards,
MarisStella team
To the blog 'The Reconstruction of the Barque Stefano':
Barque Stefano 1/63 scale 44.13`` 112.1cm Model Ship Kits MarisStella
To the shop gallery, Barque 'Stefano' 112,1cm 1:63:
Barque Stefano 1/63 Model Ship Kits MarisStella


